
❤️🔥 Valentine’s Day Scrapbook Layout Using Busy Paper — Sprinkles, Cookies & TOTAL Chaos! ✨
- This Chick Loves Paper

- Feb 5
- 13 min read
A Valentine’s Day Saga, Continued…

Some scrapbook layouts whisper sweet nothings.
This one?
She kicks the door open, dumps an entire jar of sprinkles on the floor, and screams,
“HAPPY VALENTINE’S DAY, BABY!!” 😂
If you joined me for Sugar Cookies, Sprinkles & The Stones — Part 1, buckle up…
because the sequel brings twice as many pages, twice as many photos, and roughly eight times the chaos my poor coffee table endured.
Picture this: seven kids, seven plates of aggressively decorated cookies, frosting in colors Crayola didn’t approve, fourteen sticky little fingers, twenty-three open tubs of Funfetti icing slowly melting into the table… and me, in the corner, whispering,
“I will scrapbook this someday. I will NOT burn the evidence. I AM a fun mom.”
And today… that day has arrived.
We’re turning all that real-life Valentine’s chaos — the messy cookie plates, the holographic hearts, the rogue runaway sprinkles — into a double-page 12x12 Valentine’s Day Scrapbook Layout that matches the vibe perfectly: loud, busy, hilarious, sugary, and absolutely unforgettable.
So grab your Bubble Bath cardstock, your Espresso ink, your silver foil sheets, and maybe a broom (in case the sprinkles start talking again), because…
It’s time to craft our way through the Valentine’s Day cookie mayhem! 🍪💘✨
✂️ MATERIALS FOR THIS VALENTINE’S DAY SCRAPBOOK LAYOUT

(Busy Paper, Cookies & Total Chaos Edition!) 💘🍪
Okay, confession time:
Yes… I bought the entire Made With Love Product Suite Collection.
No regrets. ZERO. Because I knew I’d use every single piece — and ohhh boy, did I.
But don’t worry! Every product below is also sold individually, so you can grab exactly what you need without committing to the full suite (unless you also love a good “add to cart before I think about it” moment).
Here’s exactly what I used for this Valentine’s Day Scrapbook Layout and why — so you can recreate this deliciously chaotic double-page Valentine’s layout without guessing.
❤️ Patterned Paper (DSP)
• Stampin’ Up! Made With Love DSP — full 12x12 backgrounds, accent blocks, and those beautifully busy patterns that match the chaos of seven kids + sprinkles.
• Stampin’ Up! Silver Foil Sheets — tiny heart die-cuts, shaker jar lids, and little flashes of shine that echo the holographic plates from cookie day.

❤️ Cardstock
• Stampin’ Up! Real Red 12x12 Two-Tone Cardstock
– ¼” border strips across top & bottom of both pages
– Large double mats behind the photo grids
• Stampin’ Up! Basic White 12x12 Cardstock
– Inside layers for all double mats
– Base layers for the die-cut cookies
• Stampin’ Up! Bubble Bath 8½” × 11” Cardstock
– Top “frosting” layer of each cookie
– Inked edges for that soft, sugary look
• Stampin’ Up! Early Espresso Two-Tone Cardstock
– Photo mats (3½” × 3½”) with interior mats at 3¼” × 3¼”
❤️ Stamps & Dies

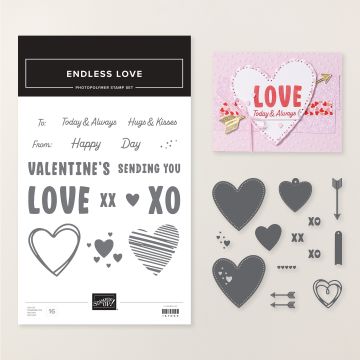


• Stampin’ Up! Endless Love Bundle
– XO + XX die-cuts for embellishments
– Tiny hearts for shaker filler & page scatter
– Arrows for accents
• Stampin’ Up! Hearts of Elegance Bundle
– Large cookie shapes + additional heart layers
❤️ Inks


• Stampin’ Up! Early Espresso Classic Stampin’ Pad
– Shading the “cookie edges” with a sponge dauber
• Stampin’ Up! Bubble Bath Classic Stampin’ Pad
– Soft frosting tint around the top cookie layers
• Stampin’ Up! Real Red Classic Stampin’ Pad

❤️ Tools & Adhesives
• Stampin’ Cut & Emboss Machine — for all heart dies & cookie layers
• Stampin’ Up! Paper Trimmer — cutting mats & DSP blocks
• Stampin’ Up! Sponge Daubers — cookie shading magic
❤️Other Tools:
• Tape Runner — fast, flat adhesion
• Liquid Glue — detail work + shaker jar assembly
• Cricut Maker — shaker jars + the COOKIES title (See Below)
❤️ Cricut, Embellishment & Photo Papers I Use in My Projects
*As an Amazon Associate, I earn from qualifying purchases.


Cricut® Essentials
• Cricut® Maker 3 — my primary cutting machine for titles, SVGs & embellishments
• Cricut® StandardGrip 12×12 Mat — 3 count used for cardstock, photo paper & labels
Photo Papers
• Canon Photo Paper Plus Glossy II (4×6, PP-301) → For 4x6 or smaller - printed photos
• Canon Matte Photo Paper (MP-101, 8.5×11) → Used for Cricut print-then-cut elements & titles
• Canon Double-Sided Matte Photo Paper (MP-101D, 8.5×11) → Also used exclusively for Cricut embellishments, icons, & layered pieces
Printer
Canon® Printing System (Photos + Printable Cricut Elements)
• Canon TS9521C Crafting Printer — used for ALL printed project photos, journaling pieces, print-then-cut embellishments & titles
🤩 How to Tame the Busy Paper & Survive the Sprinkle Storm
1️⃣ STEP ONE — Build the Background Like You’re Frosting a Cake
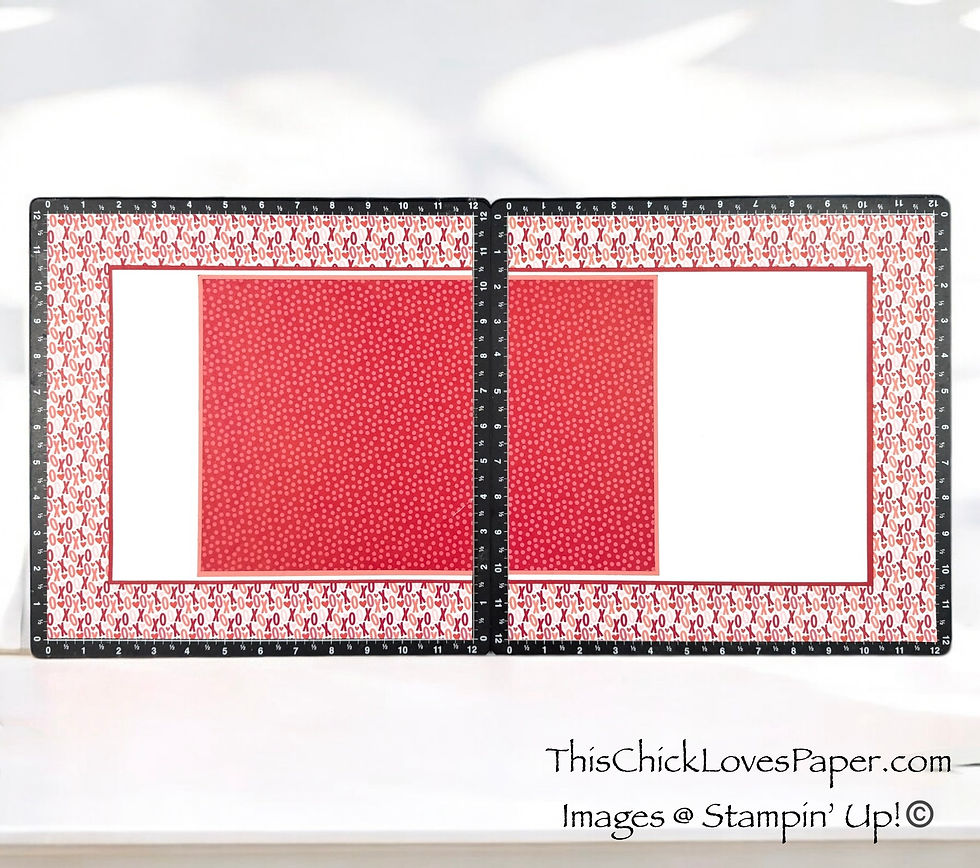
Start with your Stampin’ Up! Have a Heart DSP — the bold, busy XO XO pattern that screams Valentine’s Day sugar rush.

Start with your 12×12 Have a Heart DSP and hollow out the center exactly like the photo — because symmetry may be optional in cookie decorating, but not on this layout. 😉
📏 DSP Border Cuts (Both Pages)
Follow this exact border sizing:
• Top border: 2¼”
• Right border: 2¼”
• Bottom border: 2¼”
• Inside edge (where the two pages meet): 1” border only
Why the skinny border on the inside? Because when these two pages snuggle up in your album, that tighter 1” frame keeps the whole layout from feeling too heavy in the center. (We love busy paper… but we also love controlling the chaos. 💅)
This cut leaves you with a perfect XO-covered frame AND a chunky piece of DSP from the middle — which you can use later because listen…
✨ WE DON’T WASTE CUTE PAPER IN THIS HOUSE. ✨

Now let’s build those Real Red + Basic White double mats — the layers that calm the chaos and give your photos a clean place to shine.
📏 Inner Mat Layers (Both Pages)
Cut the following:
Real Red Cardstock: 10¼” × 9”
Basic White Cardstock: about ⅛” smaller on all sides than the Real Red (so that pretty red edge peeks out like gloss on a freshly frosted cookie)
Once you’ve cut both pieces, adhere the Basic White on top of the Real Red to create your double mat.
Then, center the finished double mat inside the hollowed-out DSP frame.
Do this for BOTH pages so the whole spread looks like it was baked in the same batch. 🍪💗
💡PRO TIP: This DSP is busy (like “seven kids fighting over the sprinkle jar” busy).
If you want even more clarity and contrast, lightly drag a Real Red or Black ink pad along the edges before adhering. Instant definition. Zero bulk. Total chef’s kiss.
STEP 2 — Layer the “Photo Block Foundation” (Quick, Cute, and Chaos-Proof)
Time to add the two Flamingo panels that will hold your photo mats — one large on the left, one narrow on the right.
LEFT PAGE PANEL
📏 Flirty Flamingo: 7¾” × 8½”
RIGHT PAGE PANEL
📏 Flirty Flamingo: 4¼” × 8½”
📏 Real Red Polka-Dot DSP: ⅛” smaller
✔ Adhere each DSP piece onto its Flamingo base.
✔ Now position BOTH panels by aligning them from the center fold of your layout (just like the photo).
This leaves:
a tall skinny column on the left page for your sideways COOKIES title, and
a wide open space on the right page for your 5×7 feature photo mat.
Why this works:
These Flamingo blocks instantly anchor the design, calm the busy DSP, and set up the perfect structure for your photo grid and main focal image — without overwhelming the page.
STEP 3 — Build the Photo Grid (a.k.a. The “Look at My Cute Kids” Zone)
Now it’s time to lay down the REAL stars of the show — the photo mats that will hold every sugary, sticky, frosting-covered memory from cookie night.
You’ll create six 3x3 photo mats total, all double-matted so they pop beautifully off that busy XO DSP.
Here’s the recipe:

📸 The Espresso Mats (because this layout needed a little caffeine)
• Cut six Early Espresso mats: 3½” × 3½”
• Cut six Basic White mats: 3¼” × 3¼”
Layer the white on top — these crisp squares instantly brighten the layout AND tighten the colors of your photos.
That warm, rich Espresso helps everything look cohesive, especially against bold red patterned paper.
📸 Placement (the secret to balancing busy DSP)
• Left Page: Add four of your 3x3 mats inside the large Real Red polka-dot block — two on top, two on bottom. Cute, neat, perfectly gridded.
• Right Page: Add the remaining two 3x3 mats inside the smaller polka-dot block on the left side of that page. They stack top + bottom like little Valentine twins.

📸 The Big Feature Mat (for your hero photo)
Then build your showstopper:
• Early Espresso mat: 5” × 7”
• Basic White inner mat: 4¼” × 6¼”
Place this big beauty on the right side of the right page — it anchors the entire spread and gives your favorite cookie-decorating moment the spotlight it deserves.
Add Real Red Cardstock border strips (12” × ¼” top & bottom of both pages) and suddenly, your layout starts looking intentional. Like you didn’t wrestle sprinkles off the floor and watch frosting melt during this photoshoot. Like you planned this all along. 😉
PRO TIP: If your busy DSP feels a little… loud, darker mats (like Espresso) act like visual bumpers. They frame your photos and calm the chaos — without muting the fun.
STEP 4 — Build the Title (a.k.a. The COOKIE Command Center)
Every great sequel needs a great title… and this one needed to be LOUD, iconic, and just a little rebellious. So for Step 4, we’re building the star of the show: the “COOKIES” title.

🍪 Cricut Magic, Activate!
Fire up Design Space because we’re going full Print Then Cut for this one.
I created the Rolling Stones-inspired tongue — YES, she had to come back for the sequel — and then swapped her in place of the first “O” in COOKIES.
Because honestly… the layout demanded it.
🍪 Layered Letters for Drama
• Cut the COOKIES letters in Early Espresso cardstock
• Stack and glue each letter so they’re thick, dimensional, and bold enough to stand up to that busy XO paper. This gives the whole title weight.

🍪 Placement: Adhere the entire title vertically along the left edge of your left page.
It fills that space perfectly and balances the grid.
💡 PRO TIP: When using loud DSP, anchoring your layout with a bold title is EVERYTHING. It creates instant structure, instant theme, and instant “ohhhhhhh THAT looks good.”
Step - 6 Cookie Chaos & Sprinkle Magic — Time to Embellish! 🍪✨

Now that your title is in place, it’s time to bring this layout to life with cookies, sprinkles, shine, and all the delicious chaos this Valentine’s Day deserves.
❤️ Build the Cookies First
Start with your big cookie bases using the Hearts of Elegance Bundle — cut from Basic White. Layer your “frosting” using Endless Love heart dies in Bubble Bath.
Ink the edges of BOTH layers with Early Espresso to get that perfect “fresh-from-the-oven” shading. Then add your Real Red XX die-cuts on top — because apparently this layout decided kisses were the theme, NOT hugs. (And honestly? It fits the Rolling Stones tongue energy. 😂)

❤️ Place the Cookies on the Layout
Your cookies should anchor the clusters:
✔ One near the title (Rolling Stones tongue + cookie = iconic)
✔ One at the top of the right page
✔ One near the bottom right photo mat
These create a visual triangle and keep the layout flowing beautifully.
❤️ Add the Sprinkle Jars — the REAL stars of this layout
Cut your jars with Cricut Print-Then-Cut, then glam them up:
• Add mini silver foil hearts right on top of the printed hearts inside each jar
• Pop each jar up on foam tape
• Tilt them slightly so it looks like they’re mid-pour (trust me… ADORABLE)
❤️ Now… let those sprinkles SPILL!

This is where the layout suddenly becomes ALIVE.
Use the Loose Valentine’s Assortment to create actual sprinkle trails:
✔ Let the sprinkles “fall” from the jar
✔ Add a few silver foil hearts to the spill for shine
✔ Scatter the shapes so they look natural—not lined up (messy = magic here!)
And yes… I placed one jar, so its sprinkly chaos is falling RIGHT onto the Rolling Stones tongue.
Because if a kid hasn’t poured sprinkles directly into their mouth at least once… are they even living? 😂
❤️ Add Arrows & Final Touches
Tuck one silver foil arrow behind the top cookie on the right page.
This pulls the eye upward and adds the perfect subtle shimmer.
Sprinkle a few more tiny foil hearts around your clusters to tie everything together.

STEP 7 — Add a Flip Flap (Because More Photos = More Chaos 😘)
To finish things off, I added a 3” x 3” Flip Flap — the easiest way to sneak in an extra photo and tuck your journaling somewhere cute and hidden.
Place it anywhere you’re not already using embellishments. That’s the magic of Flip Flaps — they work literally anywhere.
Basically… Flip Flaps = free real estate for your storytelling.
🎉 BUSY PAPER? TAMED. CHAOS? SCRAPPED. LAYOUT? COMPLETE!

When you step back and look at these two pages together, something magical happens: all that Valentine madness — the frosting, the cookie crumbs, the rogue sprinkles — suddenly becomes a story that works.
And the star of the show? The busy DSP.
Yep. The same bold, loud, rule-breaking paper everyone says you’re “supposed” to avoid.
Guess what? We used it anyway.
We matched it to the plates, echoed it in the photos, softened it with clean mats, and balanced it with lighter embellishments… and suddenly the chaos became the charm.
This layout is proof that busy paper doesn’t have to boss you around — you can absolutely tame it, shape it, and let it do the storytelling for you.
Minimal embellishments, soft colors, intentional placement…and BOOM. A layout that feels alive, joyful, and perfectly messy in all the right ways.
Because real life is busy, Valentine cookie tables are BUSIER. And scrapbooking it all?
🥳 That’s where the magic lives.
❤️ EXPLORE MORE — If You Love Chaos, You’ll LOVE These Layouts Too!
If this sprinkle-studded cookie whirlwind made your crafty heart skip a beat, you’re going to adore my other story-rich scrapbook layouts! From Disney adventures to Christmas cookie nights to our first Valentine’s chaos layout (Part 1!), each project is packed with color, personality, and real-life memory-keeping magic.
Ready for more scrapbook inspiration that feels like sitting at the table with your best friend, glue on your fingers? ✨💗


❤️ SHOW ME THE SWEET, SWEET CHAOS YOU CREATED!

Did you dive into the Made With Love collection? Whip up a cookie-decorating layout? Scrap a Valentine’s sugar rush? Or maybe your sprinkles staged a rebellion, too? 😂
Whatever delicious disaster you crafted —
I WANT TO SEE IT!
Share your masterpiece in the Members Gallery so I can scream, swoon, gasp dramatically, and shower you in more praise than a kid seeing extra frosting on their cookie.
Because your creations don’t just inspire… ✨ They start full-blown crafting riots of JOY. ✨
❤️ FINAL THOUGHTS — ROAR AT THAT BUSY PAPER, BABY!

This double-page Valentine’s Day Scrapbook Layout isn’t quiet, delicate, or shy… and honestly? THANK GOODNESS.
It’s bold.
It’s loud.
It’s frosted, sprinkled, chaotic, hilarious —
Exactly like the real-life moment it came from.
And that gloriously busy patterned paper?
Most scrapbookers tiptoe around it.
Not me.
Nope.
I walked right up to that wild DSP, cracked the whip, and said:
“I make the rules here.”
By pairing it with clean mats, soft colors, intentional embellishments, and minimal clusters, we didn’t just use busy paper —
✨ I tamed it. ✨
I let it tell the story without letting it swallow the photos.
I made it part of the magic instead of something to fear.
So let this layout be your permission slip:
Break the rules.
Grab the bold paper.
Match the chaos.
Tell the story exactly as it happened — sprinkles, smudges, mayhem, and all.
Because the messy moments, they’re always the ones worth remembering.❤️
April – This Chick Loves Paper
🛒 Grab Your Supplies & Get Crafting!

All photos and projects are subject to copyright © ThisChickLovesPaper.com
Images © Stampin’ Up!® & CTMH®
The content in this blog is the sole responsibility of April Raine – This Chick Loves Paper, Independent Stampin’ Up!® Demonstrator.
The use of and content of classes, services, or products offered is not endorsed by Stampin’ Up!®.
This double-page 12x12 Valentine’s Day scrapbook layout uses bold, busy paper, cookie embellishments, shaker jars, and a 7-photo grid to capture the chaos and sweetness of cookie-decorating day.
Includes full measurements, materials, and a step-by-step tutorial so you can recreate this playful design with ease. A Valentine’s Day scrapbook layout created by This Chick Loves Paper.

⭐How I Protect My DSP, Cardstock & Finished Cards
*As an Amazon Associate, I earn from qualifying purchases.
I store my DSP, cardstock, scraps, and even finished cards in these clear resealable bags.
The 2-mil thickness is perfect for everyday crafting (they make a 4-mil option if you want extra durability!), and they’re tough, reusable, and great for keeping your entire crafting stash clean, tidy, and protected from the chaos of the craft room.
• 13×13 Plymor 2mil Zipper Reclosable Bags — for 12×12 DSP, cardstock sheets & scraps
• 9×12 Plymor 2mil Zipper Reclosable Bags — for 8.5×11 cardstock & scraps
• 6x8 Plymor 4mil Heavy Duty Reclosable Bags — for storing extra die cut embellishments & finished cards, card workshop kits

Stamping & Precision Tools
*As an Amazon Associate, I earn from qualifying purchases.
• MISTI® Memory Size with 12-1/2" x 12-1/2" Stamping area — for borders, backgrounds & oversized stamping
• MISTI® Stamp Tool Bar Magnet - Additional magnet

Journaling Tools
*As an Amazon Associate, I earn from qualifying purchases.
• Avery® Easy Peel® Full-Sheet Clear Labels (8665) → Used for long typed journaling strips
• Avery® Clear Shipping Labels 2×4 (8663) → Used for short typed journaling strips or blocks
Archival Black - Assorted Point Sizes -
Used for handwritten Journaling
Speciality Adhesives
*As an Amazon Associate, I earn from qualifying purchases.
• Tombow® Mono Aqua Liquid Glue — for corners, details & layered paper pieces
• Bearly Art Precision Craft Glue (4oz Original) — for embellishments & fine-detail gluing
• Tombow® Mono Air Touch Adhesive— my preferred tape runner for base
• Tombow® Mono Air Touch Adhesive, Refill 2-Pack — my preferred tape runner for base layers


Comments