
Bright, Bold & Intentionally Chaotic — A Valentine’s Day Scrapbook Layout Tutorial
- This Chick Loves Paper

- Jan 22
- 14 min read
Updated: Jan 27

⚠️ Viewer Advisory:
This scrapbook layout may require protective eyewear due to extreme Valentine’s Day brightness, boldness, and sprinkle-induced sparkle. 😎✨
Proceed with joy… and maybe a little eye-protection of choice.
Let me tell you exactly how this layout was born. Picture this: five kids and two adults crowded around my coffee table, frosting flying across state lines, sprinkle jars rattling like maracas, and sugar cookie dough clinging to every available surface. It looked like Cupid had detonated a heart-shaped glitter bomb. And honestly?
It was perfect.
So I leaned into it.
Because not every scrapbook layout needs to be tidy, soft, pastel, or whispering, “I’m delicate.” Sometimes the story is the chaos. Sometimes the vibe is loud, messy, joyful, chaotic-on-purpose Valentine energy… and that is exactly what this page represents.
This isn’t just a layout — it’s a snapshot of the moment. The giggles. The sugar rush. The frosting fingerprints. The Rolling Stones cookie (yes, we’ll talk about it).
So grab your trimmer, your foam tape, and maybe a cookie or two… because we’re about to craft like Cupid after three espresso shots. 💗⚡️🍪
🍬 Materials for This Valentine’s Day Scrapbook Layout (Made With Love Collection)

Below is the full supply list showing what each item was used for. I purchased the Made With Love Product Suite Collection, but every item is also available individually, so I’ve listed each product by name and exactly how it was used on this layout.
Patterned Paper (DSP)

Stampin’ Up! Made With Love DSP — heart patterns used for both base pages and strip accents.
Stampin’ Up! Silver Foil Speciality DSP — baking sheets & metallic accents
Cardstock
Stampin’ Up! White Willow 12×12 Cardstock — trimmed to 11” x 10” for interior mats
Stampin’ Up! Real Red 8.5” x 11” Cardstock — base mats for photo panels & the final “Sugar Cookies" title
Stampin’ Up! Early Espresso 8.5” x 11” Cardstock — strips, shadow layers, tags, circles, and photo mats
CTMH Shortbread 12×12 — cookie bases, title for “The Stones,” heart “cookie” embellishments (can substitute any light beige or brown)
Stamps & Dies


Stampin’ Up! Endless Love Bundle — heart bases, XO accents, arrow.s
Stampin’ Up! Hearts of Elegance Bundle — smaller heart layers for “frosting” effect
Stampin’ Up! Homemade Treats Bundle — piping bags & cookie sheets
Stampin’ Up! Deckled Circle Dies — grounding circles for a visual triangle
CTMH Tag Die Set — layered recipe-style tag
Inks
CTMH Intense Black Ink Pad — dragged edges for distressed definition on strips, mats & embellishments
CTMH Shortbread Ink Pad — softly blended edges on cookie embellishments
🛠 Tools & Embellishments

Stampin’ Cut & Emboss Machine - Die Cutting Embellishments
Stampin’ Up! Paper Trimmer — all precise measurement cuts
Stampin’ Up! Loose Valentine Assortment — tiny sprinkles
Stampin’ Up! Bubble Bath 1/8" Faux Ribbon — bow & tag detail
Stampin’ Up! Antique Pearls — Center decorative ribbon detail
Cricut Maker 3 — title letters & sprinkle containers (Below)
Fine Tip Glue / Tape Runner — adhesion (Below)
Foam Tape — for popping the title & embellishments
⭐ Cricut Essentials & Adhesives I Use in My Projects
*As an Amazon Associate, I earn from qualifying purchases.


Cricut® Essentials
• Cricut® Maker 3 — my primary cutting machine for titles, SVGs & embellishments
• Cricut® StandardGrip 12×12 Mat — 3 count used for cardstock, photo paper & labels
Printer
Canon® Printing System (Photos + Printable Cricut Elements)
• Canon TS9521C Crafting Printer — used for ALL printed project photos, journaling pieces, print-then-cut embellishments & titles
Photo Papers
• Canon Photo Paper Plus Glossy II (4×6, PP-301) → For 4x6 or smaller - printed photos
• Canon Matte Photo Paper (MP-101, 8.5×11) → Used for Cricut print-then-cut elements & titles
• Canon Double-Sided Matte Photo Paper (MP-101D, 8.5×11) → Also used exclusively for Cricut embellishments, icons, & layered pieces
Speciality Adhesives
• Tombow® Mono Aqua Liquid Glue — for corners, details & layered paper pieces
• Bearly Art Precision Craft Glue (4oz Original) — for embellishments & fine-detail gluing
• Tombow® Mono Air Touch Adhesive— my preferred tape runner for base
• Tombow® Mono Air Touch Adhesive, Refill 2-Pack — my preferred tape runner for base layers
🍪 Mix, Layer & Sprinkle — The Sweet Steps Behind This Valentine’s Day Layout

Before we dive into measurements, here’s the one important note:
All measurements are written width-across × length-down (because that’s how THIS chick rolls!).
Let’s get messy. Let’s get bold. Let’s get SWEET.
Here are the steps behind the chaos.
Step 1 — Hollow Out Those Heart Papers (Because We Don’t Waste the Cute Stuff)
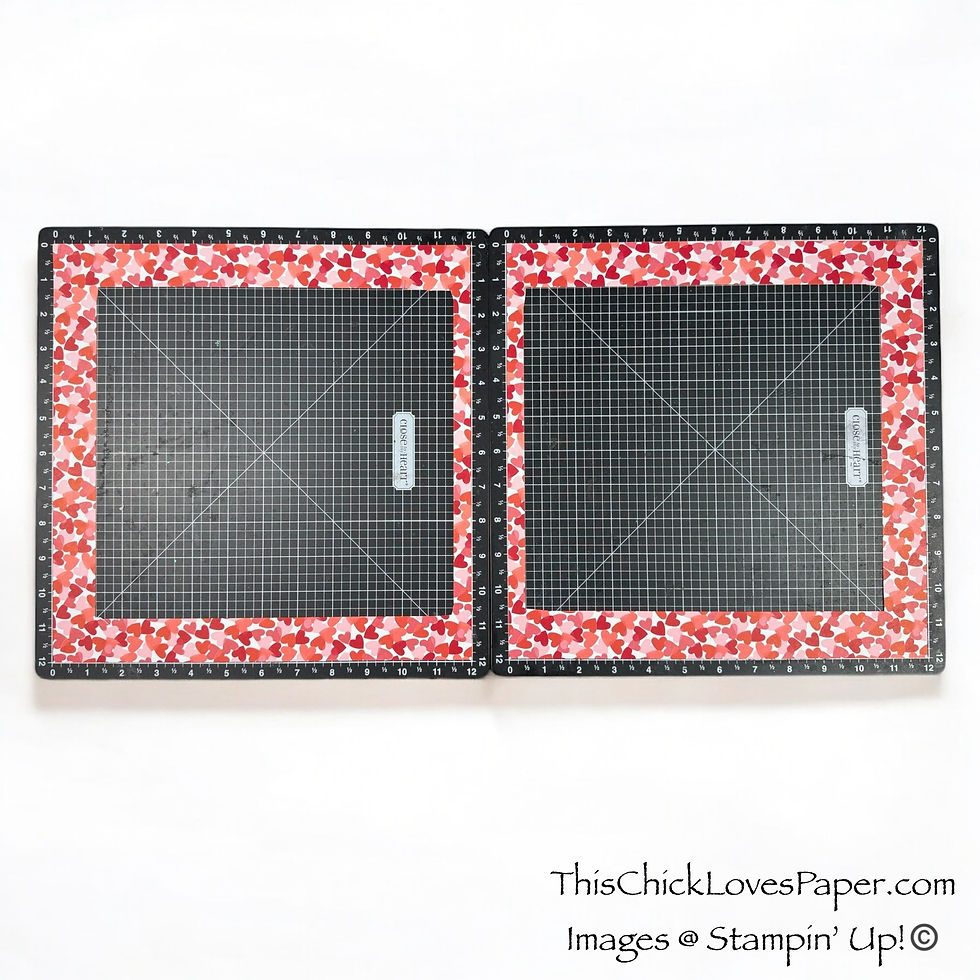
We start with two full sheets of the heart-patterned Made With Love DSP.
To maximize usable paper, hollow out the center:
Cut 1-1/4” from three outer edges
Cut 1/2” from the inner edge (the sides that meet in the center when pages are next to each other)
This gives you a strong outer frame AND larger leftover pieces for future projects.
✨ Pro Tip: If your DSP is this adorable… You always hollow the center. Waste nothing. Hoard everything. Reuse forever.
Step 2 — Add the White Willow Mats (A Clean Canvas for the Chaos To Come)

Cut two sheets of White Willow to 11” x 10” and adhere them centered inside your hollowed frames.
Start in the middle where the two pages meet — this keeps the borders perfectly symmetrical once the layout is connected.
✨ Pro Tip: Press from the inside outward when adhering large mats to avoid “air bubbles” that can distort photos later.
Step 3 — Bubble Bath Strips (The Sweetest Pink You Ever Did See)

Cut two 11” x 4-1/2” strips of Bubble Bath DSP.
Lightly drag each edge across the CTMH Intense Black ink pad — just enough to define the edges without darkening the pink.
Adhere horizontally across both pages at matching heights.
✨ Pro Tip: Horizontal strips create stability in a loud layout — they’re the “visual exhale” that balances bright color explosions.
Step 4 — Espresso Accents (Our Skinny Strips of Chocolate Goodness)

Now we’re adding the thin Early Espresso cardstock strips — the little “chocolate dividers” that keep all these Valentine colors from melting into each other.
From Early Espresso scraps:
• Left strip: 6” × 1/4”
• Right strip: 4-1/2” × 1/4”
Directly above each Early Espresso strip, add the Real Red patterned DSP strips from the Made With Love collection:
• Left DSP strip: 6” × 2”
• Right DSP strip: 4-1/2” × 2”
Just like before, all pieces are lightly inked using CTMH Intense Black by softly dragging the edges across the ink pad — enough to define the layers without making them look grungy.
✨ Pro Tip: Early Espresso acts like a visual break between Bubble Bath and Real Red — the skinny dark strip keeps the pinks from blurring into the reds and gives your eye a crisp resting point. Think of it like adding a bit of dark chocolate between two sweet frosting layers… suddenly everything pops and feels intentional.
Step 5 — Build the Double-Matted Photo Panels (A Layout Within a Layout)
Now we start building the two big “visual anchors” of the page — the double-matted photo foundations that pull everything together and balance all that glorious Valentine chaos.
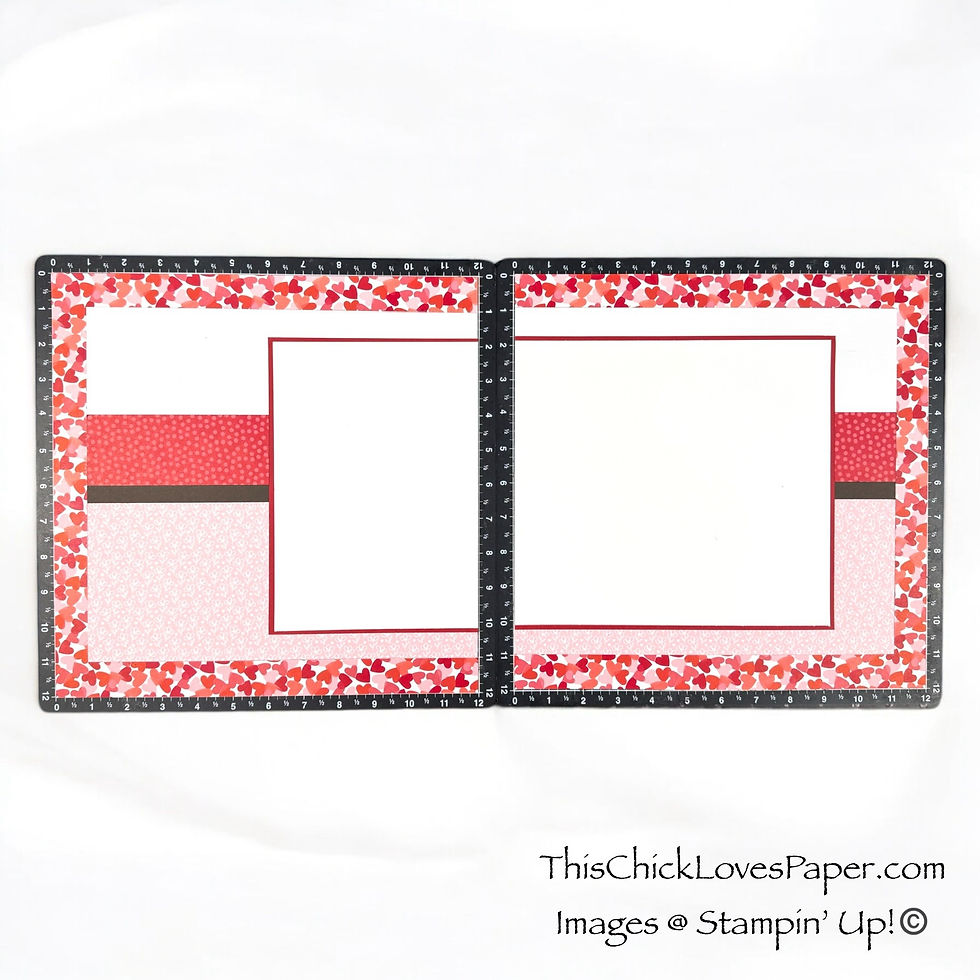
Left Page Mats:
Real Red: 6” x 8-1/2”
White Willow: 5-3/4” x 8-1/4”
Right Page Mats:
Real Red: 9-1/4” x 8-1/2”
White Willow: 9” x 8-1/4”
Layer the White Willow pieces directly on top of their Real Red bases, leaving that perfect 1/4” border all the way around — clean, sharp, and so satisfying.
Once your mats are assembled, adhere them directly to your layout — this part is important.
Place both large Real Red/White Willow mats so that, when the two scrapbook pages sit side-by-side, the inner edges of the mats touch perfectly in the center. Almost like they’re holding hands.
✨ Pro Tip: These larger mats don’t just hold your photos… They anchor the entire story and give your eyes a place to rest while everything else parties around them. They’re the calm inside the cookie-decorating storm.
Step 6 — Photo Mats (Five Photos, Three Sizes, One Fabulous Hot Mess)

Two 4x6 Photos: (Left & Right Page):
Early Espresso: 4-1/2” x 6-1/2”
White Willow: 4-1/4” x 6-1/4”
Three 3x3 Photos (Right Page):
Early Espresso: 3-1/2” x 3-1/2”
White Willow: 3-1/4” x 3-1/4”
One 4x3 Photo (Left Page):
Early Espresso: 4-1/2” x 3-1/2”
White Willow: 4-1/4” x 3-1/4”
All edges inked in very lightly in Intense Black.
Place all photo mats inside the double-matted panels EXCEPT the 4x3 — that one intentionally overlaps the 4x6 for that layered “pile of cookie photos on the table” vibe.
Step 7 — Title Time: Sugar, Sprinkles & The Stones (Stacked, Chunky, Delicious Dimension)

This title wasn’t just “cut and stick.” Oh no… we gave it the full royal treatment.
I designed the entire title in Cricut Design Space, printed it as a Print Then Cut, and then created dimensional magic by cutting the letters separately from cardstock and stacking them FOUR layers deep. This gives that bakery-sign, cookie-shop, chunky dimensional vibe that absolutely makes the layout.
Color Choices:
• “Sugar Cookies” → Real Red (Stampin’ Up!)
• “The Stones” → Shortbread (Close To My Heart)
• “&” symbol → Early Espresso (Stampin’ Up! — dark side of the two-tone cardstock)

After the print-and-cut was complete, I cut each word’s letters individually from the correct cardstock color four times, stacked them with precision (and maybe a few deep breaths), and then adhered each stacked word directly on top of the printed version.
Why?
Because nothing beats that puffy, high-end, Cricut-engineered dimensional title moment.
Finally, I lifted the entire title with foam tape, giving it a dramatic shadow and making it sit like the crown jewel of the page.
⭐ Pro Tip: A stacked title is the fastest way to make your layout look like you spent 12 hours crafting… when really you spent 11 of those hours looking for your scissors. 😜
Step 8 — Add the Deckled Circles (Because Chaos Still Needs a Little Structure)

Before diving headfirst into cookies, piping bags, and sprinkle jars, we need to lay down the foundation pieces that keep this layout intentionally chaotic — not accidentally chaotic. And that starts with the circles.
Using the Stampin’ Up! Deckled Circles Dies, cut your grounding circles in:
Early Espresso (dark, rich, grounding)
White Willow (soft, bright contrast)
Layer each pair together and place them in a visual triangle around the layout:
Bottom left corner (under the future recipe-tag cluster)
Top of the right page (nestled behind the 3×3 photo mats)
Lower right corner (slightly higher than the left circle to keep the page feeling lifted and energetic)
This triangle becomes the “quiet anchor” for the entire design, giving the eye a place to land before jumping into all the joyful Valentine’s chaos happening on top.
⭐ Pro Tip: When you’re building a layout with LOTS of movement (sprinkles, bright colors, energetic photos), circles act like little stop signs for the eye — softening the busyness and keeping everything readable, intentional, and beautifully balanced.
⭐ Step 9 — Build the Embellishment Clusters (Where the Chaos Gets Cute)
Now that our grounding circles are in place, it’s time to fill them with ALL the sugary, sprinkly magic that makes this layout feel like a Valentine’s Day bake-off exploded in the best possible way.
Each cluster uses the same repeating “cookie” element,s so the page feels cohesive — but each one tells its own little story.
🍪 Step 9A — Bake the Cookies (These Cuties Go in Every Cluster)

Before we place anything, we have to make the stars of the show: the cookies.
These adorable little heart cookies start with CTMH Shortbread bases, cut using the Endless Love larger heart die. Then we add “frosting” using White Willow hearts from the Hearts of Elegance dies — a perfect size difference that makes them look like iced sugar cookies straight off a cooling rack.
To give them a mouthwatering dimension, ink the Shortbread edges with Shortbread ink.
Add your XO and XX letters (cut from Real Red with Endless Love dies), and suddenly these aren’t paper hearts anymore — they’re edible-looking love bites.
Pro Tip: When your paper cookies look this good, make multiples. They’re the layout equivalent of “one more won’t hurt.”
📌 Step 9B — The Left Cluster: The Story Tag & Cookie Duo

Nestled into the lower-left grounding circle, this cluster sets the memory-rich tone for the whole layout.
Start with your double-layered recipe tag:
• CTMH Early Espresso tag base
• White Willow layer trimmed to 1-3/4” × 2-3/4”
• Edges inked in Intense Black
• Add the date, a Fresh Freesia bow, and an antique pearl to finish it off
Next, add your cookie duo — two staggered heart cookies with different “frosting” colors — tucked right against the tag for that natural, just-baked look.
Lay the Real Red piping bag across the bottom tips of the cookies. It anchors the cluster and gives the whole scene that perfect mid-frosting moment.
💗 Step 9C — The Top-Right Cluster: A Little Cookie, a Little Chaos, a Lot of Cute

This cluster sits inside the top-right grounding circle, peeking over the 3×3 photo block like a tiny Valentine’s Day vignette.
Start with your cookie sheet (Homemade Treats dies), layered in Silver Foil with an Early Espresso backing so it looks like a real mini baking pan tucked behind the photo.
Next, add one frosted XO cookie—Shortbread base, Bubble Bath icing & Real Red lettering—slightly overlapping the cookie sheet for that “fresh from the tray” moment.
Then, place your sprinkle jar (Cricut print & cut) on top, popped up with foam tape. Tilt it just a touch so it feels playful, like someone jiggled the table mid-cookie-decorating.
❤️ Step 9D — The Bottom-Right Cluster: Cookies, Cut-Outs & a Silver Arrow Send-Off

This final cluster sits inside the largest grounding circle on the right page and acts as the “anchor moment” that pulls the whole chaotic Valentine energy together.
Start with your cookie sheet (Homemade Treats dies), cut from Silver Foil and backed with Early Espresso so it looks like a real little baking pan tucked behind the circle. On top of the cookie sheet, add three tiny Shortbread hearts (Endless Love dies), each inked softly in Shortbread for that warm, golden-baked look.
Next, tuck in your two signature XO cookies arranged side-by-side so they feel like they were just slid off the tray.
Then add the piping bag, popped up on foam tape so it looks like it’s mid-squeeze, as if someone was still decorating cookies when the photo was taken.
Finish the cluster with one bold Silver Foil arrow (Endless Love dies), pointing back toward the photos. It visually reins in the chaos and guides the eye straight to the storytelling.
💕 Step 9E — Final Sprinkle Touches (Because Chaos Needs Continuity)

To finish the embellishments and tie all three clusters together, it’s time for the sprinkle scatter — the tiny detail that makes this layout feel alive, playful, and perfectly chaotic.
Start on the left page, adding a sprinkle jar (Cricut print-and-cut, popped up on foam) at the lower corner of the 4×6 photo mat.
Once it’s in place, scatter a mix of Loose Valentine Assortment sprinkles around its base so it looks like someone bumped the table mid-frosting… because honestly, that’s exactly how the day went.
Then, repeat the same sprinkle treatment around the sprinkle jar in the TITLE cluster — yes, the jar itself was already part of the title design, but this is where you added loose sprinkles to make it look like candy hearts were tumbling right out of it.
These scattered sprinkles visually connect every part of the layout and reinforce the intentionally chaotic Valentine’s Day energy you built this whole page around.
🍭 Layout Complete — Loud, Proud & Sweet Enough to Cause a Toothache

And just like that… the chaos becomes a masterpiece.
Every strip, every stacked letter, every frosted cookie embellishment all came together to recreate the energy of that unforgettable sugar-fueled afternoon.
This layout feels like Valentine’s Day:
bright, bold, messy, loud, sweet, hilarious… and absolutely full of love.
And yes — the Rolling Stones cookie made the final cut.
Because memory-keeping isn’t about perfect photos or perfectly tidy pages…
It’s about telling the truth of the moment, sprinkles and all. 💗✨
🍪 Explore More Sweet, Sticky & Sprinkle-Filled Layout & Card Ideas
If this layout made your heart beat faster than a kid on a sugar rush, you’re going to LOVE diving into more food-themed, chaos-inspired scrapbook layouts & cards on the blog.
From Christmas gingerbread disasters to summer ice cream meltdowns to birthday bake-offs gone sideways — food memories are some of the most joyful, relatable stories we preserve.
Scroll the gallery and find your next delicious inspiration — because every treat, every mess, every giggle, and every “oops” deserves its own layout.


💌 Show Off Your Sweetest Creations — Join the Cookie Chaos Crew!

If this bright, bold, gloriously chaotic Valentine’s layout made you smile (or crave a cookie), I need to see what YOU create next. Whether your photos feature sugar-covered kids, a frosting catastrophe, or a Rolling Stones cookie that stole the whole show, your layouts deserve a moment in the spotlight.
Upload your finished pages to the Members Gallery so we can all gasp, cheer, and maybe even steal an idea or two — that’s what crafty besties do. And don’t be shy… the messier the story, the better the scrapbook page.
💌 Final Thoughts — Chaos, Cookies & Crafting Magic

When I look at this layout, I don’t just see paper and photos.
I see the kids laughing so hard they couldn’t breathe.
I see frosting fingerprints on my table.
I see the Rolling Stones cookie that absolutely stole the show.
I see a moment I never want to forget… preserved in all its loud, messy, beautifully imperfect glory.
Scrapbooking is storytelling.
And sometimes the best stories are the chaotic ones!
Stay sweet, stay sassy, and stay intentionally messy…
because memory-keeping should feel as joyful as the memories themselves. 💗✨
April – This Chick Loves Paper
🛒 Grab your supplies & get crafting!

All photos and projects are subject to copyright © ThisChickLovesPaper.com
Images © Stampin’ Up!® & CTMH®
The content in this blog is the sole responsibility of April Raine – This Chick Loves Paper, Independent Stampin’ Up!® Demonstrator. The use of and content of classes, services, or products offered is not endorsed by Stampin’ Up!®.
Discover how to make a bright, bold, intentionally chaotic 12×12 double-page Valentine’s Day scrapbook layout using the Stampin’ Up! Made With Love Suite Collection. This five-photo design features handmade cookie-and-baking embellishments, stacked Cricut title work, and easy strip layering in a full step-by-step tutorial created by This Chick Loves Paper.

⭐How I Protect My DSP, Cardstock & Finished Cards
I store my DSP, cardstock, scraps, and even finished cards in these clear resealable bags.
The 2-mil thickness is perfect for everyday crafting (a 4-mil option is also available for extra durability), and they’re tough, reusable, and great for keeping your entire crafting stash clean, tidy, and protected from the chaos of the craft room.
Different sizes are available! Here are the ones I use the most:
*As an Amazon Associate, I earn from qualifying purchases.
• 13×13 Plymor 2mil Zipper Reclosable Bags — for 12×12 DSP, cardstock sheets & scraps
• 9×12 Plymor 2mil Zipper Reclosable Bags — for 8.5×11 cardstock & scraps
• 6x8 Plymor 4mil Heavy Duty Reclosable Bags — for storing extra die cut embellishments & finished cards, card workshop kits
⭐ More Tools I Use in My Projects


Stamping & Precision Tools
• MISTI® Memory Size with 12-1/2" x 12-1/2" Stamping area — for borders, backgrounds & oversized stamping
• MISTI® Stamp Tool Bar Magnet - Additional magnet
Journaling Tools
• Avery® Easy Peel® Full-Sheet Clear Labels (8665) → Used for long typed journaling strips
• Avery® Clear Shipping Labels 2×4 (8663) → Used for short typed journaling strips or blocks
• Skaura Pigma Micron Fineliner Pens - Archival Black - Assorted Point Sizes - Used for handwritten Journaling


Comments