
🍦 YOU GOT ME DRUMSTICKS! A Cardstock-Only Scrapbook Layout That’s Sweeter Than Dessert
- This Chick Loves Paper

- Mar 12, 2024
- 8 min read
Updated: Dec 15, 2025

There are scrapbook layouts that make you smile…
There are scrapbook layouts that make you laugh…
And then there are scrapbook layouts that make you snort-laugh, crave ice cream, and feel like you just watched the funniest moment of your kid’s entire childhood unfold right in front of you.
This one? This layout is all of the above — wrapped in Sapphire, sprinkled with Journey, dipped in chocolate cardstock goodness, and topped with “OMG MOM WE HAVE DRUMSTICKS?!”
Energy. 🍦🤣💥
Let me set the scene: It’s an ordinary day. We open the freezer. And suddenly — BOOM — pure magic.

My little man spots a box of Drumsticks he didn’t know existed… and the look on his face? Scrapbook GOLD. The kind of joy that stops time, melts hearts, and makes you sprint for your phone because this NEEDS to be documented forever.
And because I’m me — instead of scrapping the moment with regular patterned paper like a normal human 😂 — I decided to recreate the entire Nestlé Drumstick box out of cardstock.
This layout is bold.
It’s funny.
It’s a little chaotic.
And it deserves a spotlight brighter than the freezer light that started it all.
Get ready to drizzle and sprinkle—oops, I mean cut and layer—because these materials are the real treat.
🍫Materials That Made the Magic (Cardstock-Only Sweetness!) — Drumstick Scrapbook Layout Supplies
This 12×12 single-page layout uses nothing but Close To My Heart cardstock — every cone, every dot, every mat, every label. Here’s the delicious palette that brought it to life & the Stampin' Up! crossover colors to recreate it:
🍦 Cardstock Colors:


White Daisy – for the clean background + inner circle mat (White Willow)
Candy Apple – bold outer frame, red accent labels (Poppy Parade)
Sapphire – the hero strip mimicking the Drumstick box (Night of Navy)
Journey – circles, photo mats, shading, and color of the year flair (Pretty Peacock)
Shortbread – waffle cone base (Basic Beige)
Acorn – cone grid detail (Pecan Pie)
Mocha & Mink – chocolate shell (Early Espresso)
⭐ Other Tools I Use in My Projects
*As an Amazon Associate, I earn from qualifying purchases.


Cricut® Essentials
• Cricut® Maker 3 — my primary cutting machine for titles, SVGs & embellishments
• Cricut® StandardGrip 12×12 Mat — 3 count used for cardstock, photo paper & labels
Printer
Canon® Printing System (Photos + Printable Cricut Elements)
• Canon TS9521C Crafting Printer — used for ALL printed project photos, journaling pieces, print-then-cut embellishments & titles
Photo Papers
• Canon Photo Paper Plus Glossy II (4×6, PP-301) → For 4x6 or smaller - printed photos
• Canon Matte Photo Paper (MP-101, 8.5×11) → Used for Cricut print-then-cut elements & titles
• Canon Double-Sided Matte Photo Paper (MP-101D, 8.5×11) → Also used exclusively for Cricut embellishments, icons, & layered pieces
Printer Ink
• EZ Ink Compatible 280XXL/281XXL Ink Pack → The exact ink set used for the TS9521C
Stamping & Precision Tools
• MISTI® Memory Size with 12-1/2" x 12-1/2" Stamping area — for borders, backgrounds & oversized stamping
• MISTI® Stamp Tool Bar Magnet - Additional magnet
Speciality Adhesives
• Tombow® Mono Aqua Liquid Glue — for corners, details & layered paper pieces
• Bearly Art Precision Craft Glue (4oz Original) — for embellishments & fine-detail gluing
• Tombow® Mono Air Touch Adhesive— my preferred tape runner for base
• Tombow® Mono Air Touch Adhesive, Refill 2-Pack — my preferred tape runner for base layers
Journaling Tools
• Avery® Easy Peel® Full-Sheet Clear Labels (8665) → Used for long typed journaling strips
• Avery® Clear Shipping Labels 2×4 (8663) → Used for short typed journaling strips or blocks
• Skaura Pigma Micron Fineliner Pens - Archival Black - Assorted Point Sizes - Used for handwritten Journaling
My Storage System
• 13×13 Plymor 2mil Zipper Reclosable Bags — for 12×12 DSP, cardstock sheets & scraps
• 9×12 Plymor 2mil Zipper Reclosable Bags — for 8.5×11 cardstock & scraps
• 6x8 Plymor 4mil Heavy Duty Reclosable Bags — for storing extra die cut embellishments & finished cards, card workshop kits
🍦💥 Scoop, Layer & Repeat — The Step-by-Step Build of This Ice Cream Scrapbook Layout!
Before we dive into the full step-by-step, here’s a little confession: this layout was created during my baby scrapbooker era — back when I had no stamps, no dies, no fancy tools, and absolutely NO idea that one day I’d be teaching layouts on a blog. 😂 At the time, Cricut Design Space® was my entire crafting universe. If it didn’t exist as an SVG, it didn’t exist for me, period.
So naturally, when inspiration struck, I ran straight to Design Space like, “Alright, show me what you’ve got for ice cream cones and Drumstick logos!” And honestly? For a brand-new crafter with nothing but cardstock and chaotic enthusiasm, this layout came together like magic. Creative naïveté is wildly underrated. 💁🏻♀️✨
1️⃣ Base, Borders & That Sapphire Strip

To start the sweetness, I layered a 12×12 Candy Apple cardstock base and hollowed out the center (because we save cardstock around here!). On top of that, I added an 11.5 × 11.5 White Daisy panel for a bright, clean foundation.
Next came the star of the “box art”: a bold Sapphire horizontal strip running straight across the center of the page. This strip is everything — it’s the visual cue that screams HELLO, I AM A DRUMSTICK BOX IN SCRAPBOOK FORM. The Sapphire instantly anchors the entire design and sets the tone for the playful color palette.
2️⃣ Polka Dots, Circles & Ready-For-Chocolate Layers
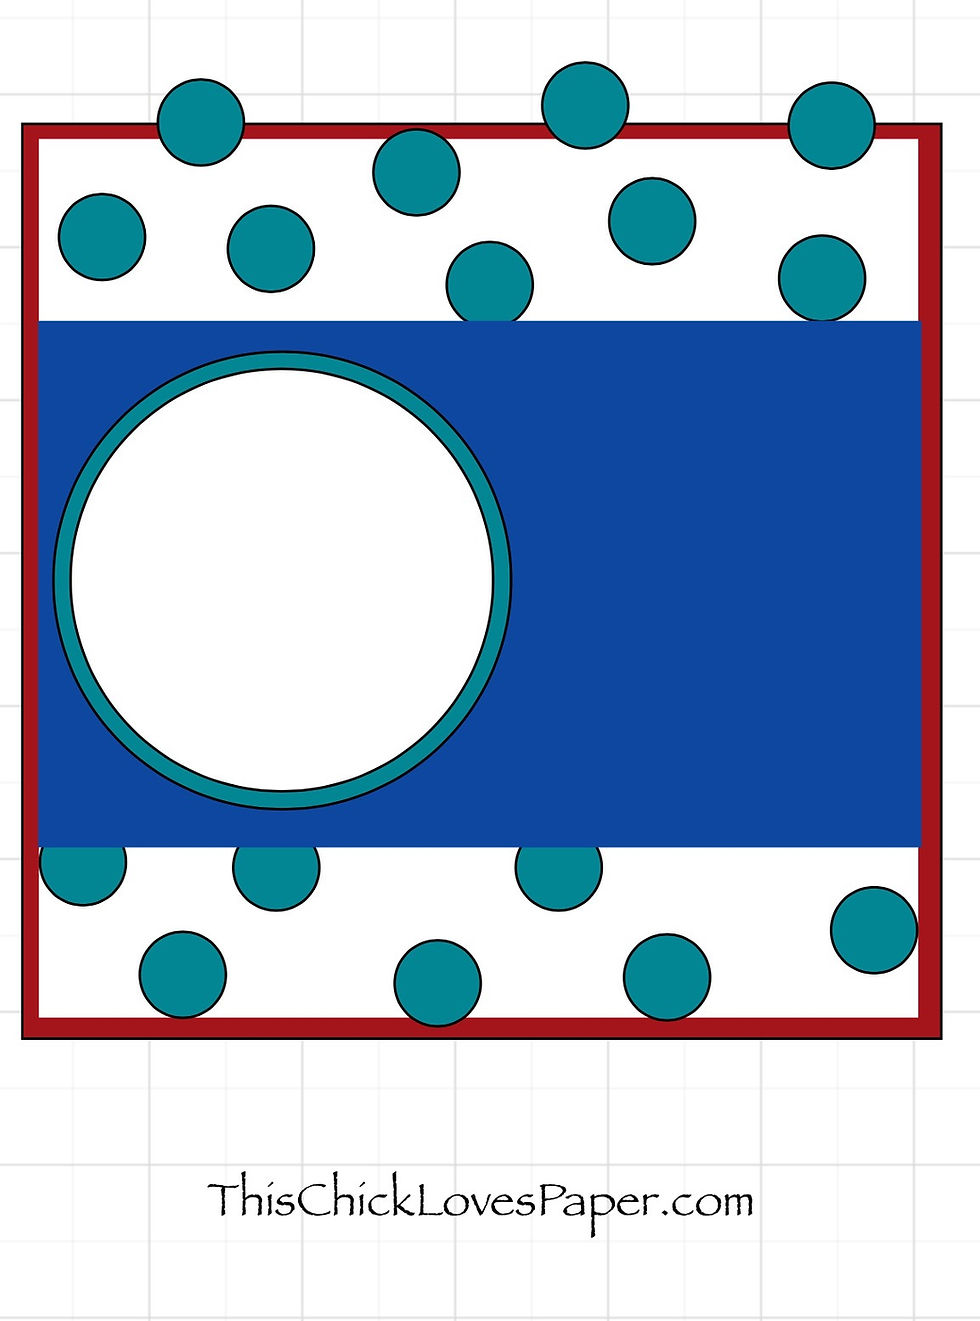
Before adding any cones or titles, I sprinkled the layout with Journey cardstock circles along the top and bottom.
Each circle was lightly inked with Journey ink using a sponge dauber — just enough shadow to mimic printed packaging without losing the playful vibe.
Then I cut two layered circles, one from Journey cardstock and one from White Daisy. These became the stage for the giant Drumstick logo.
Once stacked and centered over the Sapphire strip, the layout suddenly had structure, balance, and vintage ice-cream-box charm.
3️⃣ The Ice Cream Cones (A Cardstock Glow-Up!)

The cones were my favorite part — tiny, adorable, instantly recognizable, and cut entirely from CTMH cardstock. I found the perfect SVG files in Cricut Design Space®, sized them down, and built each cone using:
Shortbread for the waffle
Acorn for the grid lines
Mocha & Mink for that chocolate shell
White Daisy for the creamy ice-cream center
A little Journey Ink blending added the depth that makes the cones look almost edible. Once assembled, I placed three cones on the logo circle — instantly transforming a blank circle into a bold, tempting “ice cream trio” spotlight.
4️⃣ Titles, Labels & YES — “Origional” Was 3000% On Purpose 😂

Next came the titles and those iconic Drumstick labels — all designed in Cricut Design Space® and cut to mimic the real box. But the true star of this section? The word “Origional.”
Yes, spelled exactly like that.
No, I didn’t fail fourth-grade English.
This spelling is courtesy of my son — who, for reasons unknown, said it with the most dramatic Southern drawl you’ve ever heard. Think Sam Elliott in Tombstone trying to order ice cream. 😆
And here’s the thing: scrapbooking isn’t just about the photos — it’s about the tiny, fleeting details you swear you’ll remember forever… until suddenly you don’t. So I intentionally misspelled “original” on the layout because that moment, that voice, that silly mispronunciation deserved to be preserved exactly as it lived.
It’s funny. It’s personal. And it turns this Drumstick replica from “cute craft project” into a story-filled memory I get to treasure forever.
5️⃣ The Photos That Started It All
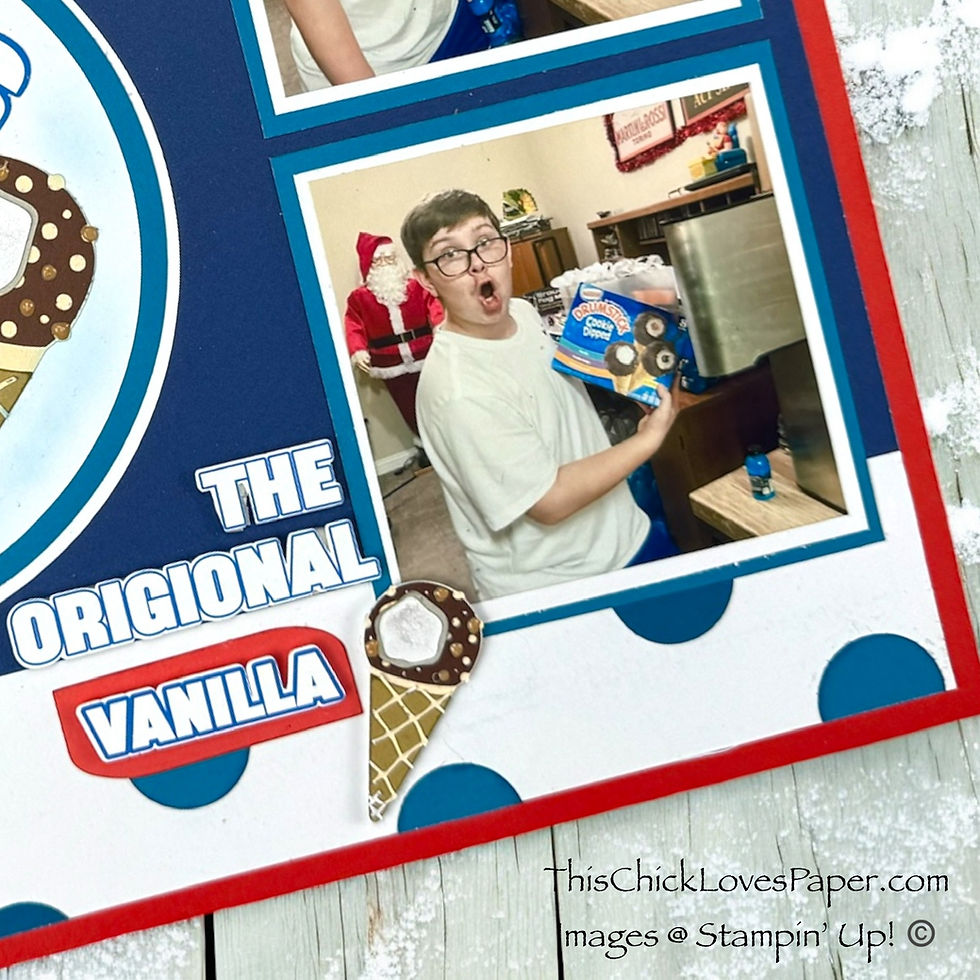
To the right side of the page, I added two photos of my son’s priceless reaction when he discovered the Drumsticks in the freezer.
The expressions? UNMATCHED.
They deserved dramatic matting — so each photo is double-matted in Journey + White Daisy, with inked edges for extra definition.
This layout may have started as a silly idea, but these photos are why it became one of my favorites EVER.
6️⃣ Hidden Journaling with Flip Flaps
There was no room on the front for journaling (the ice-cream box took over 😆), so I added a Flip Flap behind the layout where I can handwrite the full story — including the way he said “Origional” like a little cowboy from Tombstone. Still laughing. Still obsessed. Still documented forever.
🎉✨ Layout Wrap-Up: A Drumstick-Inspired Scrapbook Page Too Sweet to Forget

When I look at this layout, I can feel the joy. I can hear his laugh. I can remember the exact moment that the freezer door opened and his whole face lit up. This page isn’t just cardstock — it’s childhood, humor, nostalgia, and memory-making magic all blended together.
Everything from the Sapphire strip to the cones to the silly misspelling makes this layout one of my all-time favorites. It’s playful, bold, funny, and it proves that inspiration is everywhere — even in the frozen food aisle of your own house.
🍪 Craving More Creative Calories? Explore More Food-Themed Scrapbook Ideas!
If this Drumstick layout made you hungry for more delicious inspiration, wait until you see what other tasty treats I’ve turned into scrapbook themes! From cookies to gingerbread to pizza nights — food layouts always deliver sweetness AND stories.


🍦📸 Share Your Sweet Creations!

There is nothing — nothing! — more joyful than a scrapbook layout inspired by life’s tastiest little surprises, and I know you’ve got some delicious stories tucked into your albums too!
Maybe it was the first time your kiddo baked cookies and covered the kitchen (and themselves) in flour, or that late-night ice cream run where you laughed until your sides hurt.
Maybe you have a photo of someone sneaking the last cupcake… or a layout celebrating a family recipe passed down like treasure.
Whatever your sweet memory looks like, I want to see it! Upload your layouts to our Members’ Gallery so we can sprinkle love on your creations, cheer you on, and maybe even spark a craving or two while we’re at it. Let’s fill the gallery with sugar, smiles, and stories that make life — and scrapbooking — even sweeter. 🍨💛✨
🍨 Final Thoughts: This Layout Is Proof That ANYTHING Can Inspire Creativity

A box of ice cream? Scrapbooked.
A hilarious mispronunciation? Preserved.
A moment of pure joy? Captured forever.
This is why I love scrapbooking — it turns everyday life into art we get to remember forever. And now if you’ll excuse me… I suddenly feel the need to grab a Drumstick from the freezer. 😆🍦
April – This Chick Loves Paper
Grab your supplies & get crafting.

💖 All photos and projects are subject to copyright ThisChickLovesPaper.com.
📸 Images © Stampin’ Up!
📝 The content in this blog is the sole responsibility of April Raine - This Chick Loves Paper as a Stampin’ Up!® Independent Demonstrator. The use of and content of classes, services, or products offered is not endorsed by Stampin’ Up!®
A sweet and hilarious 12×12 single-page Drumstick-inspired scrapbook layout made entirely from cardstock! 🍦😂 This step-by-step tutorial shows how I recreated the iconic ice-cream box using CTMH colors, Cricut cuts, layered cones, and my son’s adorable “Origional” quote.
Designed by This Chick Loves Paper, this layout includes 2 photos and creative cardstock-only techniques.


Comments