
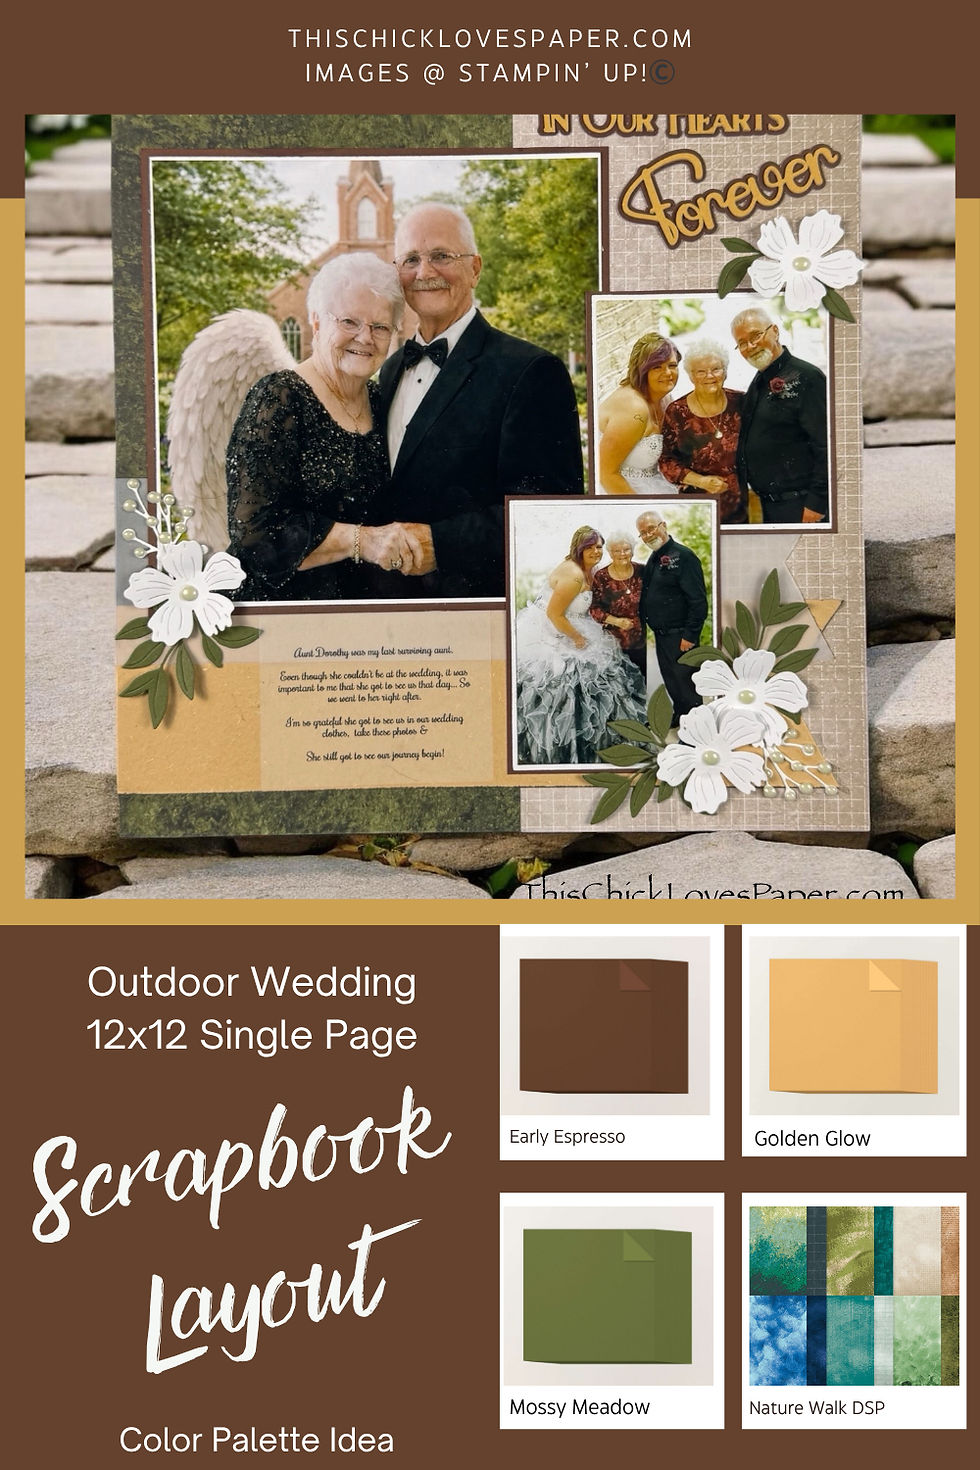
💍 12x12 Single Page Wedding Scrapbook Layout – Elegant Outdoor Design with 3 Photos
- This Chick Loves Paper

- 2 hours ago
- 10 min read
Some scrapbook pages are pretty. And then some scrapbook pages hold a moment so tightly you can almost feel it breathe.

This 12x12 single-page wedding scrapbook layout was created as the final page in a surprise anniversary album — designed by a groom for his bride. And yes… let’s all collectively swoon for a second because what groom even thinks of that?
And this one holds something especially meaningful.
After the ceremony, still dressed for the day, they went to see his last surviving aunt so she could witness the beginning of their journey.
She has since passed… but that moment with Aunt Dorothy lives here. Preserved. Layered. Framed.
Because some memories aren’t loud — they’re sacred. And when something matters that deeply, you don’t minimize it. You honor it. You let it take up space…And that’s exactly what we did here.
Alright friends, grab your trimmer… maybe a tissue or two... Because we’re about to turn a meaningful memory into a masterpiece.
🤍 What You’ll Need for This 12x12 Single Page Wedding Scrapbook Layout

Designer Series & Specialty Papers
• Stampin’ Up! Nature’s Walk 12” x 12” Designer Series Paper (green base foundation + right-side vertical panel + layered script strip details)
• Stampin’ Up! Natural Hues 12” x 12” (30.5 x 30.5 cm) Textured Specialty Paper (gold horizontal strip layered beneath the vellum for warmth and contrast)
• Stampin’ Up! Vellum 12” x 12” Specialty Paper (soft translucent strip layered above the gold for added dimension and journaling base)
Cardstock
• Stampin’ Up! Early Espresso Two-Tone 12” x 12” Cardstock (base, torn element, bottom strip, photo mats)
• Stampin’ Up! Golden Glow Two-Tone 12” x 12” Cardstock (title + layered accents)
• Stampin’ Up! Mossy Meadow Two-Tone 12x12 Cardstock (leaves)
• Stampin’ Up! Basic White 8-1/2 x 11" Cardstock (photo mats, flowers, sprigs)
Embellishments
• Stampin’ Up! Antique Pearls— the perfect tiny accents for flower centers and the poinsettia sprigs.
Stamp & Die Bundles


• Stampin’ Up! Helped Me Grow Bundle (leaves)
• Close To My Heart Secret Garden Dies (sold by Stampin’ Up!) – flowers
• Stampin’ Up! Poinsettia Petals Bundle – sprigs
• Stampin’ Up! Meant To Bee Bundle - banners

Tools
• Stampin’ Up! Paper Trimmer— used for every straight cut on the layout: DSP panels, photo mats, vellum strips, and those long horizontal bands.
• Stampin’ Up! Cut & Emboss Machine—floral piece, sprig, and leaf used in the bouquet clusters.
• Stampin’ Up! Take Your Pick - Multipurpose pickup and precision tool with tacky putty end easily picks up sequins, paper accents, and other small objects.
(*As an Amazon Associate, I earn from qualifying purchases.)

Printers - Embellishment & Photo
• Canon TS9521C Crafting Printer — used for printed journaling pieces, print-then-cut embellishments & titles
• Epson PictureMate PM-400 Wireless Compact Color Photo Printer, white — compact wireless printer makes it easy to print beautiful 4" X 6" And 5" X 7" Photos
• EPSON 320 Standard Capacity (T320) Works with PictureMate PM-400, Multicolor - printer ink refills
💐 How to Create a 12x12 Single Page Wedding Scrapbook Layout (Step-By-Step Tutorial)

This 12x12 single-page wedding scrapbook layout is designed around one oversized 7½” x 7½” hero photo, supported by two layered accent photos. Three photos total—zero clutter. Maximum impact.
✂️ STEP ONE: Build the Base of Your 12x12 Single Page Wedding Scrapbook Layout

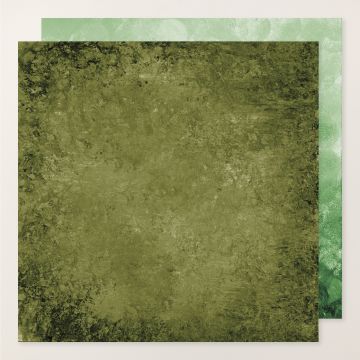


Start with a full 12” x 12” sheet of the green Nature’s Walk DSP as your foundation.
For the right-side neutral panel, ideally, you would cut one solid piece measuring: 5½” wide x 12” tall. That gives you a clean vertical split, making this 12 x 12 single-page scrapbook layout feel structured yet organic.
But here’s the real-life crafting confession…

I didn’t have one solid 5½” x 12” piece left.
So instead of panicking, I got resourceful.
I used two pieces.
The second piece wasn’t long enough, so I split it in half and positioned the two halves at the top and bottom of the panel, leaving the gap in the center. Once the photo is adhered, you would never know the paper was pieced together.
That’s the reality of scrapbooking; sometimes you don’t have the perfect size, so you design around it. And when you layer intentionally, no one ever sees the workaround.
✂️ STEP TWO: Add Texture, Layers & That Signature Wedding Scrapbook Glow
Now that your base for this layout is in place, it’s time to build dimension and softness.
Cut your strips as follows:
• Gold / Natural Hues cardstock – 12” x 2½”
• Vellum strip – 12” x 2¼”

Now… let’s talk dovetails.
Instead of freehanding the ends (which always look like I cut them during a mild earthquake), I used the octagon die from the Meant to Be Bundle to create the perfect dovetail.
I slid the end of the strip into the die and centered it so the point hit perfectly in the middle. Run it through your machine and voilà. Crisp. Balanced. Symmetrical. Every single time. No ruler gymnastics. No guessing. No choppy ends.
Pro tip: If you struggle with dovetailing evenly, this trick will change your life.

Now adhere your strips to the page.
And let’s have a real vellum conversation for a second. Vellum shows glue. So here’s how I handle it:
• Adhere it where a photo will cover it
• Use minimal adhesive
• Or lightly smear your glue with your finger before pressing down
If you’re careful, you’ll get that dreamy translucent layer without any visible glue spots ruining the romance of this wedding scrapbook layout.
📸 STEP THREE: Double Mat All Three Photos (Exact Measurements Included)
This layout uses three photos — all double matted with a thin, elegant reveal for a refined finish. Each stack follows the same layering formula: Early Espresso (largest) , Basic White (slightly smaller) , Photo (slightly smaller again)
The key? Subtle borders. No chunky mats. Just enough separation to elevate the design.

🖼 Hero Photo (Main Focal Image)
• Early Espresso – 7½” x 7½”
• Basic White – 7⅜” x 7⅜”
• Photo – 7¼” x 7¼”
🖼 Square Photo (Upper Right)
• Early Espresso – 4” x 4”
• Basic White – 3⅞” x 3⅞”
• Photo – 3¾” x 3¾”
🖼 Vertical Photo (Bottom Layer)
• Early Espresso – 3½” x 4½”
• Basic White – 3⅜” x 4⅜”
• Photo – 3¼” x 4¼”
✨ Pro Tip: Why Ink the Edges?

Before adhering the Basic White layers, I lightly dragged the edges of the Basic White cardstock & The edges of the photos across my CTMH Mocha ink pad.
Here’s why this matters. Matting can look stark if left crisp white. That soft inking:
• Adds warmth
• Enhances separation between layers
• Prevents photos from looking “sticker-stuck.”
• Creates a subtle heirloom feel
It frames the memory without boxing it in. Light pressure. Quick swipe. Done.

✨ STEP FOUR: Create a Signature Stacked Title with Depth & Dimension
Now let’s talk about one of my favorite parts of any layout… the title.
I designed the phrase “In Our Hearts Forever” in Cricut Design Space and cut it using:
• Stampin’ Up! Golden Glow 12x12 Two-Tone Cardstock (dark side)
• Stampin’ Up! Early Espresso 12x12 Two-Tone Cardstock (dark side)
✂️ My Signature Stacking Technique
If you’re familiar with my layouts, you already know this is one of my go-to moves.
I cut each word four times and stack all four layers directly on top of each other. Then I cut the shadow layer twice for a bold, stable base.
It gives the title that subtle 3D, chipboard-like thickness — without using a single piece of foam tape.

✨ Pro Tip: Use Precision Glue for Script Titles
(*As an Amazon Associate, I earn from qualifying purchases.)
For detailed words like “Forever,” I always reach for Barely Art Precision Tip Glue.
Why? Because: The fine tip lets you trace the back of each letter cleanly without seepage.
Less mess. Less warping. More control.
And when you’re stacking layers? Control is everything.
📐 Placement Strategy
I angled “Forever” slightly for movement and kept “In Our Hearts” straight above it for balance. That combination:
• Creates visual flow
• Draws the eye downward toward the photos
• Keeps the layout from feeling rigid
Titles don’t always have to sit flat and centered. A slight angle adds life.
🌿 STEP FIVE: Build Soft Floral Clusters for Balance & Dimension
Now that the photos and title are in place, it’s time to soften the structure of this 12x12 single-page wedding scrapbook layout with layered embellishments.

🌸 White Florals
The white flowers were cut using the CTMH Secret Garden dies (previously sold by Stampin’ Up!) from Basic White cardstock.
Each center is finished with an Antique Pearl, and every petal has a small piece of foam tape underneath for subtle lift—just enough dimension to create shadow without overwhelming the page.
🌿 Leaves
The greenery was cut using the Help Me Grow Bundle from Mossy Meadow 8½” x 11” cardstock.
Some leaves are lifted with foam tape, others are adhered flat. That variation keeps the cluster feeling natural instead of bulky.

✨ Sprigs & Pearl Details
The sprigs were cut using the Poinsettia Petals Bundle from Basic White cardstock.
Even though the Antique Pearls are adhesive-backed, I secured them with Barely Art Precision Tip Glue. This layout is traveling through the mail. Nothing is popping off on my watch.
Together, the clusters form a soft visual triangle that balances the hero photo, title, and lower image — adding elegance without distraction.
✍️ STEP SIX: Add Meaningful Journaling

For this page, I used clear Avery labels and typed the journaling instead of handwriting it. And here’s why.
Sometimes your handwriting fits the vibe of a layout. Sometimes it adds personality and charm.
And sometimes… it just doesn’t.
This layout carries weight. It tells a story that matters. I wanted the words to feel clean, intentional, and easy to read — especially since they sit atop vellum and gold layers.

📐 Placement Details
The journaling is centered beneath the hero photo, layered over the vellum and Golden Glow strip.
That placement does two important things:
• It grounds the oversized 7½” focal image. • It balances the visual weight of the title and embellishments on the right side.
Emotionally, it anchors the entire layout.
✨ Pro Tip: When to Type vs. Handwrite
Here’s the simple rule I follow:
If the story is deeply sentimental — or you want longevity and legibility — type it.
If the layout is casual, playful, or everyday life, handwriting shines.
Memory keeping isn’t about forcing your handwriting onto every page. It’s about choosing what best serves the story.
🤍 Where Paper Becomes Legacy

Step back for a second. Look at it...
This isn’t just a 12x12 single-page wedding scrapbook layout. It’s a moment that almost didn’t fit into a wedding day timeline, and yet it became one of the most meaningful parts of the story.
The oversized 7½” hero photo commands attention exactly the way it should. The angled title keeps the eye moving. The soft florals create balance without stealing focus. The vellum and gold layers add warmth instead of weight. Nothing is crowded. Nothing is accidental.
Every measurement, every thin mat, every inked edge was chosen to elevate the memory — not overpower it. And that’s the magic. Sometimes scrapbook pages are decorative. And sometimes they preserve something sacred.
This one? This one will live in an anniversary album that started as a surprise and became a legacy.
And if that doesn’t deserve a hero layout… I don’t know what does.
💍 The Rest of the Story Starts Here...
This anniversary album didn’t stop at one meaningful moment.
Below you’ll find the rest of the wedding scrapbook layouts from this series — along with a few other favorite designs that show how different stories can be told with the same layered, intentional approach.
Whether you’re documenting a wedding, a birthday, a vacation, or everyday life… the design principles stay the same...
Big focal points.
Balanced layering.
Memories that deserve space.
Take a scroll and see what speaks to you next.


💍 Wedding Memories? We Want to See Them!

This layout may be part of one anniversary album… But wedding stories don’t belong to just one couple.
If you’ve created your own wedding scrapbook layout — whether it’s elegant and neutral, bold and colorful, vintage-inspired, or completely outside the box — upload it to the Members Gallery.
This space is about celebrating the moments that mattered — and seeing how differently we all choose to honor them.
Your layout might inspire someone else to tell their story. And that’s a beautiful ripple effect.
🤍 She Saw Their Beginning. This Page Holds It Forever.

Some scrapbook pages document a day.
This one protects a legacy.
What began as a quiet visit after a wedding is now preserved in paper and ink — framed, layered, and kept.
And long after flowers fade and timelines blur, this moment will still be here.
Quiet. Intentional. Forever part of their story. 💛
April - This Chick Loves Paper
🛒 Grab Your Supplies & Get Crafting!

All photos and projects are subject to copyright © ThisChickLovesPaper.com.
Images © Stampin’ Up!® & CTMH®.
The content in this blog is the sole responsibility of April Raine – This Chick Loves Paper, Independent Stampin’ Up!® Demonstrator.
The use of and content of classes, services, or products offered is not endorsed by Stampin’ Up!®.
12x12 single-page wedding scrapbook layout featuring 3 photos, a 7½” hero image, and elegant layered details. This outdoor wedding scrapbook page includes Stampin’ Up! Nature’s Walk Designer Series Paper and soft vellum journaling. Full materials list, exact measurements, and step-by-step tutorial created by This Chick Loves Paper.

⭐How I Protect My DSP, Cardstock & Finished Cards
*As an Amazon Associate, I earn from qualifying purchases.
I store my DSP, cardstock, scraps, and even finished cards in these clear resealable bags.
The 2-mil thickness is perfect for everyday crafting (they make a 4-mil option if you want extra durability!), and they’re tough, reusable, and great for keeping your entire crafting stash clean, tidy, and protected from the chaos of the craft room.
• 13×13 Plymor 2mil Zipper Reclosable Bags — for 12×12 DSP, cardstock sheets & scraps
• 9×12 Plymor 2mil Zipper Reclosable Bags — for 8.5×11 cardstock & scraps
• 6x8 Plymor 4mil Heavy Duty Reclosable Bags — for storing extra die cut embellishments & finished cards, card workshop kits


Comments