
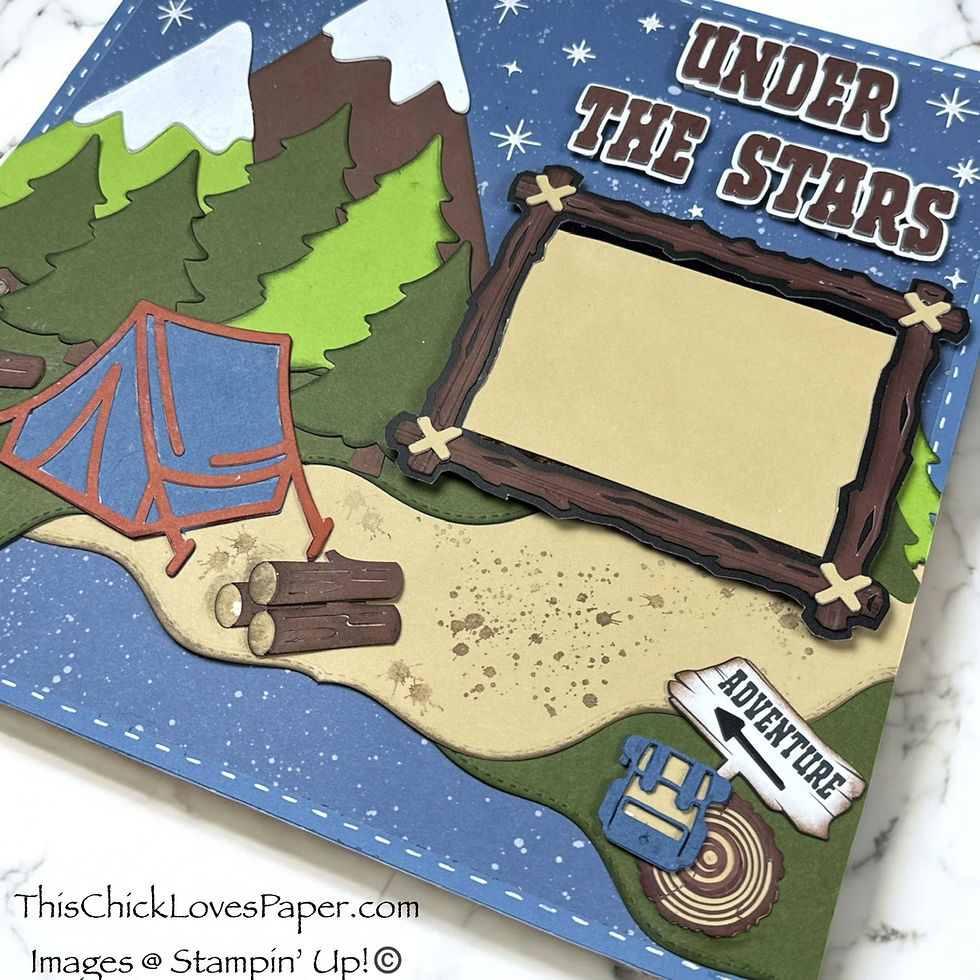
⛺ Under the Stars – 12x12 Scrapbook Layout Full of Camping Charm
- This Chick Loves Paper

- Jul 2, 2025
- 12 min read
Updated: Dec 16, 2025

You know those layouts that take a wild left turn halfway through?
This was one of those.
It started as a camping-themed scrapbook page built for one specific photo. I had the scene in mind, the mood set, and the vision ready. But somewhere between layering cardstock trees and foam-taping logs, the layout said:
“Nah. I’m telling my own story.” 😂
And just like that, the original photo no longer fit.
But here’s the magic of scrapbooking—the story doesn’t always start with a photo.
Sometimes, it starts with a feeling.
And this one? It felt like a starry sky, a warm fire, and the kind of camping trip where everything smells like s’mores and sap. So that’s the story I built.
Grab your cardstock, light the campfire (aka plug in your Cricut), and let me show you how to recreate this Under the Stars 2x12 Camping Scrapbook Layout—step by step, with no shortcuts and all the sparkle.
🧻 Campfire Checklist: Materials for the “Under the Stars” 12x12 Camping Scrapbook Layout
DSP

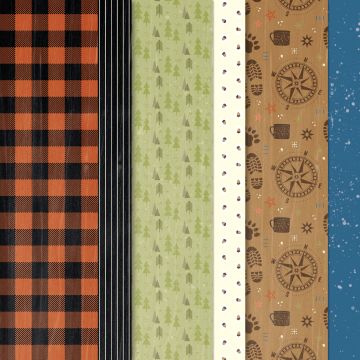


• Stampin’ Up! Weekend Adventure DSP (blue splattered night sky)
Cardstock


• CTMH Mocha or Stampin' Up! Early Expresso 12x12 Two Tone Cardstock – Mountains & Photo Frame
• Stampin’ Up! Granny Apple Green 12x12 Two Tone Cardstock – Mountains, trees
• Stampin' Up! Mossy Meadow 12x12 Two Tone Cardstock – Trees, Forrest Floor
• Stampin’ Up! Misty Moonlight 12x12 Two Tone Cardstock – Tent & Backpack
• Stampin’ Up! Cajun Craze 12x12 Two Tone Cardstock – Tent outlines
• Stampin’ Up! Basic Beige 8-1/2"x11" Cardstock – Photo mat & Forrest Floor
• Stampin' Up! White Willow 12x12 Cardstock – Moon, stars, snowcaps
Inks


• Stampin’ Up! Early Espresso Classic Stampin' Pad
• Stampin’ Up! Mossy Meadow Classic Stampin' Pad
Stamps & Thin Cuts


• CTMH Fancy Borders Dies * Can substitute Stampin' Up! Fancy Borders Thin Cuts
• Stampin’ Up! Merriest Trees Bundle (stars & trees)
Tools


• Cricut-cut: tent, campfire, logs, stars, moon, title, log slice
• White Gel Pen (faux stitching)
• Foam Tape
⭐ Other Tools I Use in My Projects
*As an Amazon Associate, I earn from qualifying purchases.


Cricut® Essentials
• Cricut® Maker 3 — my primary cutting machine for titles, SVGs & embellishments
• Cricut® StandardGrip 12×12 Mat — 3 count used for cardstock, photo paper & labels
Printer
Canon® Printing System (Photos + Printable Cricut Elements)
• Canon TS9521C Crafting Printer — used for ALL printed project photos, journaling pieces, print-then-cut embellishments & titles
Photo Papers
• Canon Photo Paper Plus Glossy II (4×6, PP-301) → For 4x6 or smaller - printed photos
• Canon Matte Photo Paper (MP-101, 8.5×11) → Used for Cricut print-then-cut elements & titles
• Canon Double-Sided Matte Photo Paper (MP-101D, 8.5×11) → Also used exclusively for Cricut embellishments, icons, & layered pieces
Printer Ink
• EZ Ink Compatible 280XXL/281XXL Ink Pack → The exact ink set used for the TS9521C
Stamping & Precision Tools
• MISTI® Memory Size with 12-1/2" x 12-1/2" Stamping area — for borders, backgrounds & oversized stamping
• MISTI® Stamp Tool Bar Magnet - Additional magnet
Speciality Adhesives
• Tombow® Mono Aqua Liquid Glue — for corners, details & layered paper pieces
• Bearly Art Precision Craft Glue (4oz Original) — for embellishments & fine-detail gluing
• Tombow® Mono Air Touch Adhesive— my preferred tape runner for base
• Tombow® Mono Air Touch Adhesive, Refill 2-Pack — my preferred tape runner for base layers
Journaling Tools
• Avery® Easy Peel® Full-Sheet Clear Labels (8665) → Used for long typed journaling strips
• Avery® Clear Shipping Labels 2×4 (8663) → Used for short typed journaling strips or blocks
• Skaura Pigma Micron Fineliner Pens - Archival Black - Assorted Point Sizes - Used for handwritten Journaling.
🪵 Step Into the Woods: Build Your Layout Like a Campsite!
Ready to step into the woods and build this scene layer by layer? Let’s set up camp and start crafting. 🏕✨

1️⃣ Start with the Starry Night Sky
Let’s kick things off with your layout’s main stage: that dreamy, speckled-blue sky from the Stampin’ Up! Weekend Adventure DSP. This 12x12 sheet sets the scene with instant drama—and it’s the perfect backdrop for what comes next.
I cut four 12” x ¼” strips of Misty Moonlight cardstock and added faux stitching using my white gel pen. I hand-drew little dashes across each strip, then adhered them right onto the DSP background to create a subtle stitched border.
So… why the strips?
Two reasons:
1. If I make a mistake with the stitching, I’m only messing up a strip, not the whole DSP sheet!
2. That little framed edge adds a soft layer of depth and dimension without overpowering the sky.
Pro Tip: Tiny dashes, dots, or even little “X” stitches can mimic constellations or a playful trail of stars. And if freehand lines stress you out, try using a ruler and light pencil marks every ¼” before inking!

2️⃣ Cut Your Mountains (and Add Snowcaps!) 🏔️❄️
I used my paper trimmer (you could totally use scissors, too!) to create two triangle-style mountains:
• One from CTMH Mocha (or Stampin’ Up! Early Espresso)
• One from Granny Apple Green
I cut the Mocha mountain slightly larger than the Granny Apple Green one. Then I inked up the edges of both triangles using Early Espresso ink to help them pop from the background and add that soft, earthy shadow around the edges.
For placement, I started by positioning the Mocha mountain toward the center of the page. Then I layered the Granny Apple Green mountain on the left, overlapping it slightly and letting it run off the edge of the page. That little bit of overlap creates instant depth and distance, making it feel like one mountain is further away than the other. So simple, but so effective!
Next, I cut snowy peaks from White Willow cardstock and glued them to the tops of each mountain. You can cut these by hand or use any icicle-style thin cut—whatever works for your snow-loving heart!

3️⃣ Build the Forest Floor 🌲
To create the forest floor for my campsite, I pulled out my Fancy Border Thin Cuts and cut two base pieces:
• Two from Stampin’ Up! Mossy Meadow cardstock
• One from Basic Beige cardstock
I cut the layers larger than I needed on purpose—here’s why: I knew I wanted to layer them to form a more realistic forest path. Even though I used the same die, I positioned and overlapped them in a way that made the lengths and curves feel more organic, like a real forest floor, not a mirror image.
After layering and adjusting their curves, I adhered them together first, then trimmed them same size and flat across the ends so they would sit neatly at the base of the mountains. This technique helped the forest floor feel like it’s rolling into the layout with depth and dimension, not just slapped on like a sticker.
Then came the inking!
• I used Mossy Meadow ink on the Mossy Meadow cardstock
• And Early Espresso ink on the Basic Beige pieces
💡 Note to future me (and you!): I added the splatters later… but I wish I had done them during this step! Whether you use a stamp, paintbrush, or even flick ink off your bone folder, add a few splatter marks or “dirt” textures to your trail. It gives that extra sense of movement and makes it feel like real boots just walked through.
4️⃣ Create Your Evergreen Trees
I die-cut my trees using the Stampin’ Up! Merriest Trees Thin Cuts, cutting from both Granny Apple Green and Mossy Meadow cardstock.
Then I inked up the edges of every single tree using my Mossy Meadow Classic Stampin’ Pad. Even though the trees were similar in color, the inking helped them blend into the forest while still standing out from one another, especially since most were cut in the same color cardstock!

Here’s where the fun (and design magic) kicked in: tree placement = visual depth. I positioned them at the base of the mountains in a way that made it look like some were further in the background, while others were closer to the “camera.” I even used slightly different sizes of trees and tucked a few behind other trees to help build that forest illusion.
The goal wasn’t symmetry—it was scene building.
Pro Tip: When placing similar colors together, use ink blending, size variation, and layered positioning to keep your scene from looking flat. Your trees should feel like they’re part of a real forest, not just lined up like paper soldiers.

5️⃣ Make & Mount Your Photo Mat
So originally, this step started out simple—just cut a mat, layer it, and move on.
But then I thought… what if the frame looked like an actual log? 🪵
I wanted to give it that total outdoor, woodsy vibe—something that felt like it was carved straight out of the forest floor.
So instead of a traditional rectangle, I went bold and used my Cricut to cut a log-style photo frame!
Here’s how I built it:

• The base layer was cut from Basic Black cardstock.
• The top log-texture layer was cut from CTMH Mocha cardstock (you can totally substitute Stampin’ Up! Early Espresso).
• After cutting, I scored the frame and inked it up using Early Espresso ink to give it even more texture and that rustic, weathered, campfire-chic vibe.
Since this log frame became such a major focal point of the page, I wanted it to stand out even more, so I popped it up using foam tape. Not only did this give the page the drama I was going for, but it also helped the entire scene feel more dimensional, like you could step right into the layout and pitch your tent.
Pro Tip: Even without your photo printed yet, you can still build and place your mat. Let the story lead the image. Sometimes the layout knows what belongs there before you do.
6️⃣ Pitch Your Tent (and Roll Out That Backpack!)
So, sometimes you have the right stamp and die, but it’s just not the right size. That’s exactly what happened with this layout! I knew what I wanted, but my tent stamp just wasn’t cutting it (pun intended 😉). So I turned to my Cricut and cut the tent to the size I needed.

This file was cool because it included a built-in outline! I cut the main tent from Stampin’ Up! Misty Moonlight cardstock and the outline from Cajun Craze. Layering them gave the tent instant dimension and contrast—exactly what I needed to make it stand out against the forest floor.
And since I was already cutting from Misty Moonlight, I went ahead and made a matching backpack too! I tucked that little gem in the bottom right-hand corner, along with a Cricut-cut adventure sign and log, to help form a strong visual triangle and bring the whole campsite scene to life, like you’re walking up the trail and just arriving at your tent.
Pro Tip: Don’t stress over perfect placement! Real campsites are messy, and your layout can be playfully organic too.
7️⃣ Light the Campfire & Stack the Logs

Being that we don’t camp much in Vegas, I don’t have many camping-themed stamps or thin cuts. So I turned to Cricut once again and cut:
🔥 A campfire out of Stampin’ Up! Cajun Craze and Daffodil Delight cardstock
🪵 A few logs out of CTMH Mocha and Stampin’ Up! Basic Beige cardstock
I inked up the edges of each of the logs with Early Espresso to give them a shadowed, “burned edge” look—like they’ve been touched by campfire magic! ✨
Once dry, I stacked them at the base of the tent using Multipurpose Glue.
8️⃣ Title It & Sparkle It Up
I designed a bold “Under the Stars” print-and-cut title with my Cricut. I then used CTMH Mocha Cardstock to individually cut each letter, stacked and adhered them to my print-and-cut title. Not only did the Mocha Cardstock add contrast to the background, but the layered letters also gave it depth and dimension.

But to take this title even further, I popped it up with foam tape. (Because when in doubt, foam it out. 😉)
Once the title was in place, I cut the stars from the Stampin’ Up! Merriest Trees bundle out of White Willow Cardstock and filled the sky. The moon was cut from my Cricut out of White Willow Cardstock as well.
Pro Tip: Add foam tape behind a few of the stars for a twinkle effect. You can even layer mini pearls, sequins, or glitter glue on top to give the sky a little “wish upon a star” sparkle!
📖 When the Layout Writes You: A Twist in the Tale

Let’s be real—this Under the Stars 2x12 Camping Scrapbook Layout had a mind of its own.
It refused to be boxed in by one photo, one idea, or even one plan. And honestly? That’s what makes this hobby magic.
Sometimes the photo leads the layout.
Sometimes the feeling leads the way.
And sometimes… the paper takes the wheel and says, “I’ve got this.”
Whether your memory is a real camping trip, a backyard tent, or something still waiting to happen, your page deserves to be told. No photo required.
✨ Explore More: Let Your Creativity Run Wild
If this “Under the Stars” layout made your crafty heart beat like a campfire crackling at midnight, wait until you see what else is waiting in the woods. My outdoor-themed pages are packed with mountains, trails, trees, texture, inky edges, and all the storytelling drama nature deserves. 🌲💚
Whether you love rustic vibes, cozy campfires, or layouts that look like they walked straight out of a national park brochure, you’ll feel right at home exploring more of my wild, woodsy, wander-worthy scrapbook creations.
And if you’ve got an adventure of your own calling your name? Grab your trimmer, fire up your Cricut, and let’s keep crafting under wide-open skies.


📸 Share Your Creations — Show Us How You Do the Great Outdoors!

What’s the craziest place you’ve camped… or crafted? Backyard tents? Living room forts? A campsite where the marshmallows burned faster than your patience? 😆
Whatever your adventure looks like, I want to see how you turn it into art.
Upload your layouts, camping pages, outdoor memories, or even just your favorite nature-inspired embellishments to the Members Gallery!
Your creativity could be the spark someone else needs to finally tell their own outdoor story — tents, trees, chaos, and all.
Whether your page is serene, wild, whimsical, or a full scrapbook plot twist like mine, bring it on. Let’s fill the gallery with campfire-worthy creativity that smells like pine, paper, and a little bit of magic. 🏕✨
🌙 One Starry Layout, Infinite Stories

You don’t always need the perfect photo to start scrapbooking. Sometimes the paper knows where the story is going before you do. 💫
This layout reminded me of something I forget far too often:
Creativity isn’t linear — it wanders, it detours, it reroutes, and sometimes it takes the scenic trail straight through your cardstock stash. And honestly? That’s the best part.
Every inked edge, every layered tree, every foam-popped detail on this page became its own memory long before a photo ever touched it. That’s the magic of scrapbooking — it lets you build the moment you felt, not just the moment you photographed.
So follow your glue. Trust your instinct. Let your layout pitch its own tent and light its own fire.
Because whether you’re documenting real adventures or crafting scenes that dream up new ones, the heart behind it is what lasts.
Wherever your next creative trail leads, I’ll be right here — cheering you on with cardstock in hand and glitter in my hair.
Crafting wild things with you always,
April – This Chick Loves Paper
🛒 Grab Your Crafting Supplies!

All photos and projects are subject to copyright. ThisChickLovesPaper.com
Images © Stampin’ Up!®
The content in this blog is the sole responsibility of April Raine, This Chick Loves Paper as a Stampin’ Up!® Independent Demonstrator.
The use of and content of classes, services, or products offered is not endorsed by Stampin’ Up!®.
Under the Stars 12x12 camping scrapbook layout tutorial featuring Cricut® cuts, inked edges, mountains, trees, and a layered night-sky scene — created by This Chick Loves Paper.
A detailed step-by-step guide perfect for outdoor memories, camping pages, and storytelling layouts. 🏕✨
⭐How I Protect My DSP, Cardstock & Finished Cards

I store my DSP, cardstock, scraps, and even finished cards in these clear resealable bags.
The 2-mil thickness is perfect for everyday crafting (they make a 4-mil option if you want extra durability!), and they’re tough, reusable, and great for keeping your entire crafting stash clean, tidy, and protected from the chaos of the craft room.
*As an Amazon Associate, I earn from qualifying purchases.
• 13×13 Plymor 2mil Zipper Reclosable Bags — for 12×12 DSP, cardstock sheets & scraps
• 9×12 Plymor 2mil Zipper Reclosable Bags — for 8.5×11 cardstock & scraps
• 6x8 Plymor 4mil Heavy Duty Reclosable Bags — for storing extra die cut embellishments & finished cards, card workshop kits


Comments