
🧜♀️ 12x12 Disney-Inspired Little Mermaid Scrapbook Layout with Glimmer Paper, Pinwheels & Ocean Magic! 🌊✨
- This Chick Loves Paper

- Jun 30, 2024
- 10 min read
Updated: Dec 15, 2025

💖 When “Too Cool” Turns Into Tradition — A Scrapbook Story Worth Flipping Your Fins Over
It was our very first Disneyland and California Adventure trip, and Lil Man was living his best park life. He was in that middle-school phase—you know the one—too grown to admit he’s still a kid, but not quite old enough to skip the snacks or the selfies. 😂
He reached for my hand and said, “Mom, this is the best trip ever.” 🥹💖
My heart melted faster than a Dole Whip in July.
But then… we saw Ariel’s Undersea Adventure.
And suddenly, the hand-holding, churro-loving boy turned into Mr. Too Cool for Princesses. 🙄
So we compromised: one photo in front of the ride, and next year—we’d actually ride it.
Fast forward a year later: deal’s a deal, baby! We hopped on the ride, giggled the whole way through, and now it’s a non-negotiable stop on every trip. 💙
He’s no longer too cool for Ariel—just too cool to admit it! 😂
So grab your dinglehopper, power up that Cricut®, and let’s create a layout that captures the shimmer, sass, and full-circle joy of this Disney-inspired moment.
🌊 What You’ll Need to Create This 12x12 Disney-Inspired Little Mermaid Scrapbook Layout with Glimmer Paper
🌈 Designer Paper (DSP)


Stampin’ Up! “Unbounded Beauty” 12x12 DSP
– Underwater tones, whimsical blends, and ocean-magic color shifts that make the perfect base layer for Ariel-themed designs.
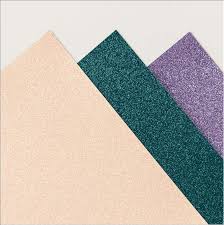
Stampin’ Up! 2024–2026 In Color Glimmer 12×12 Specialty Paper
Three Colors Glimmer Paper
– Used to create shimmering layered waves cut on the Cricut®. These papers bring the underwater sparkle to LIFE.
🎨 Cardstock


Stampin’ Up! Basic White 8½×11 Cardstock – to outline and define your waves.
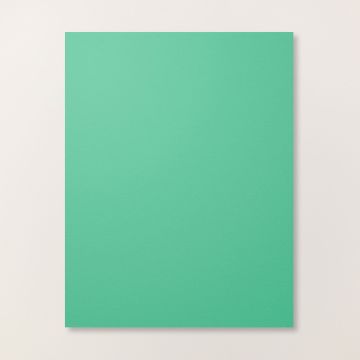
Stampin’ Up! Shy Shamrock 8½×11 Cardstock – subtle contrast for your photo mat.
🧜♀️ Stamps & Dies
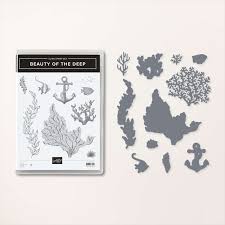


Stampin’ Up! Beauty of the Deep Bundle (Cling Stamps + Dies) – for coral, seaweed, and reef-ready details.
Stampin’ Up! Round We Go Bundle (English) – the pinwheel magic that adds movement and texture.
🎨 Inks & Coloring Tools
Stampin’ Blends Alcohol Markers – for coloring custom SVGs of Ariel and her ocean crew.
Shy Shamrock Classic Stampin' Pad – Seaweed stamping.
🦀 SVGs & Cricut® Elements

Little Mermaid SVG Bundle (Ariel, characters, icons). Purchased on Etsy, printed, cut, and colored with Stampin' Up! Stampin' Blends for a custom Disney-Inspired finish.
Cricut® Machine
– Used to cut shimmering layered waves and precise SVG images.
🛠 Tools


• Foam Adhesive Strips
• Multi-purpose glue
• Clips (shown in photo) for pinwheel stabilization
• Spray Stiffener
⭐ Other Tools I Use in My Projects
*As an Amazon Associate, I earn from qualifying purchases.


Cricut® Essentials
• Cricut® Maker 3 — my primary cutting machine for titles, SVGs & embellishments
• Cricut® StandardGrip 12×12 Mat — 3 count used for cardstock, photo paper & labels
Printer
Canon® Printing System (Photos + Printable Cricut Elements)
• Canon TS9521C Crafting Printer — used for ALL printed project photos, journaling pieces, print-then-cut embellishments & titles
Photo Papers
• Canon Photo Paper Plus Glossy II (4×6, PP-301) → For 4x6 or smaller - printed photos
• Canon Matte Photo Paper (MP-101, 8.5×11) → Used for Cricut print-then-cut elements & titles
• Canon Double-Sided Matte Photo Paper (MP-101D, 8.5×11) → Also used exclusively for Cricut embellishments, icons, & layered pieces
Printer Ink
• EZ Ink Compatible 280XXL/281XXL Ink Pack → The exact ink set used for the TS9521C
Stamping & Precision Tools
• MISTI® Memory Size with 12-1/2" x 12-1/2" Stamping area — for borders, backgrounds & oversized stamping
• MISTI® Stamp Tool Bar Magnet - Additional magnet
Speciality Adhesives
• Tombow® Mono Aqua Liquid Glue — for corners, details & layered paper pieces
• Bearly Art Precision Craft Glue (4oz Original) — for embellishments & fine-detail gluing
• Tombow® Mono Air Touch Adhesive— my preferred tape runner for base
• Tombow® Mono Air Touch Adhesive, Refill 2-Pack — my preferred tape runner for base layers
Journaling Tools
• Avery® Easy Peel® Full-Sheet Clear Labels (8665) → Used for long typed journaling strips
• Avery® Clear Shipping Labels 2×4 (8663) → Used for short typed journaling strips or blocks
• Skaura Pigma Micron Fineliner Pens - Archival Black - Assorted Point Sizes - Used for handwritten Journaling
My Storage System
• 13×13 Plymor 2mil Zipper Reclosable Bags — for 12×12 DSP, cardstock sheets & scraps
• 9×12 Plymor 2mil Zipper Reclosable Bags — for 8.5×11 cardstock & scraps
• 6x8 Plymor 4mil Heavy Duty Reclosable Bags — for storing extra die cut embellishments & finished cards, card workshop kits
🎨 Step-by-Step: How to Create This Disney-Inspired Little Mermaid Scrapbook Layout
1️⃣ Dive In: Build Your Under-the-Sea Backdrop🌊

Start with Stampin’ Up! Unbounded Beauty 12×12 Designer Series Paper as your base. I chose the green-ish tie-dye pattern because it instantly felt like shimmering water — that perfect in-between of turquoise and teal that makes you think of sunlight dancing beneath the waves.
The swirling pattern gave me all the under-the-sea vibes I wanted for this layout, and it coordinated beautifully with both Ariel’s ocean colors and my photo’s tones. The soft gradients make it look as if the page itself is alive — moving, flowing, and sparkling with mermaid magic! 🧜♀️✨
Since this layout features just one 4×6 photo, I knew I had to design the scene around it rather than behind it. That’s why this DSP was such a perfect choice — it gives subtle motion without stealing the spotlight.
Pro Tip: When choosing your background paper for ocean or pool layouts, look for designs with movement — soft gradients, flowing swirls, or watercolor blends. They instantly give the illusion of depth and make everything above them (like your waves and pinwheels!) pop right off the page.
2️⃣ Cut and Layer Your Glimmer-Paper Waves ✨

Next, grab multiple shades of Stampin’ Up! Glimmer Paper (from both the Three Colors Glimmer Paper and the 2024–2026 In Color Glimmer 12 × 12 Specialty Paper packs). I chose the blues and greens from each pack so they would perfectly complement the base Unbounded Beauty DSP and help carry that dreamy, underwater vibe across the page.
I used my Cricut® to cut gentle wave shapes in a few different sizes — but don’t worry if you don’t have one! You can totally freehand your waves with scissors or use a wave die if that’s what you’ve got in your craft stash. I just happened to have my Cricut open and ready, so it made it super easy to find a group of wave shapes and let the machine do the cutting.

To keep each glimmer layer distinct, cut matching shapes from Basic White Cardstock and tuck them slightly behind each glimmer piece—just high enough to create a bright edge where one wave ends and the next begins.
Arrange the waves across the bottom of the layout (and maybe one smaller wave up top for balance). Glue the first two directly to your background, and pop the bottom-most layer up on foam strips for that gorgeous layered dimension.
Pro Tip: Don’t let “no Cricut” stop your creativity! A little hand-cut curve or a wavy die gives the same look—and every handmade wave adds its own personality. 🌊✨
3️⃣ Craft & Secure Your Sparkling Pinwheels 🌀

Now it’s time to add the whimsical touch that brings this whole ocean scene to life — the glimmer pinwheels!
Use the Stampin’ Up! “Round We Go” Bundle to die-cut your pinwheel strips from the same shades of Stampin’ Up! Glimmer Paper you used for your waves. Normally, you’d glue the ends, let them dry, and then flatten the pinwheel, but because glimmer paper is thicker and coated with that irresistible shimmer, I changed things up a bit.
After gluing the edges together, I kept the pinwheels already flattened and secured the seams with small craft clips (you can see them in the photo above!) while the glue dried. This trick kept everything perfectly aligned without risking any cracking or dulling of that sparkle.

Once dry, I gave the backs a light mist of stiffening spray—the same one I use on flowers when I want them to hold their shape in my albums.
This layout didn’t include flowers, but with several pinwheels and embellishments layered across the page, the stiffener ensured they’d stay perky and dimensional, even with other scrapbook pages pressing on top.
Pro Tip: If you’re using regular cardstock or DSP, you don’t need clips or stiffener—just glue, dry, and go! But for specialty papers like glimmer or foil, this little extra care keeps your embellishments looking flawless and fabulous for years to come. ✨
4️⃣ Bring the Sea to Life with SVGs & Die-Cut Details 🐠✨

Now for the part that makes this layout feel truly under the sea — the layered coral, seaweed, and our favorite red-headed mermaid herself! 🧜♀️
Start by using the Stampin’ Up! Beauty of the Deep Stamp & Die Set to create coral and seaweed pieces. I stamped some directly on Basic White Cardstock. This mix of tones and textures gives that ocean-floor depth you see in Ariel’s world.
To add your character elements, use custom SVGs. I used Cricut Print Then Cut for crisp, full-color pieces, then shaded and highlighted them with Stampin’ Blends markers to bring Ariel and her friends to life.

Arrange the coral, seaweed, and SVG characters around the pinwheels and waves, letting pieces peek from behind layers to keep the eye moving across the page.
The mix of Stampin' Up! Glimmer DSP, dimension, and color balance turn the whole layout into an underwater storybook moment!
Pro Tip: If you don’t have a Cricut, you can print the SVGs on photo paper or cardstock, fussy cut them, and still achieve that layered Disney look. The key is to mix die-cut and stamped elements for a dynamic scene that shimmers like sunlight through the waves. 🌊✨
5️⃣ Matting, Mounting & Making a Splash 📸💦
Now comes the moment where the whole underwater world comes together — adding your photo!
For this 12 × 12 Disney-Inspired Little Mermaid layout, I used one 4 × 6 photo, so I knew it needed to make waves all on its own.

To help it stand out, I double-matted the photo using Stampin’ Up! Shy Shamrock Cardstock and Basic White Cardstock.
Cut your white mat to 4 ¼ × 6 ¼ and your Shy Shamrock mat to 4 ½ × 6 ½ to create that polished, layered look.
Ink the edges of both mats to define the layers — yes, even the white one!
Pro Tip: When working with specialty paper like glimmer or foil, foam adhesive adds breathing room so the light can catch the sparkle. It also helps balance the texture difference between cardstock and coated paper. 🌟
🌟 The Big Reveal: Your Disney-Inspired Little Mermaid Scrapbook Layout with Glimmer Paper!

And there it is—a layout Ariel herself would treasure! ✨
The glimmer paper waves shimmer like real sunlight on the water, the pinwheels stay crisp and perky, and that single smiling photo steals the show.
When Lil Man saw it, he said, “WOW! You nailed the scene perfectly.”
From the kid who once refused to ride it? I call that a crafting victory! 🏆
🌊 Explore More Disney-Inspired Scrapbooking Magic!
Love a layout that tells a story with shimmer and sass? Then you’ll flip your fins for my other Disney-inspired scrapbook pages! From castles and churros to fireworks and friendship, there’s a little piece of magic for every Disney fan—each page a memory preserved with pixie-level flair.
Dive in and discover how sparkle, storytelling, and a touch of laughter can turn park photos into keepsakes worth singing about. 🎶✨


🧜♀️ Share Your Disney-Inspired Creations!

Have you ever made a scrapbook layout inspired by Ariel’s world—or another Disney character that makes your heart sparkle? ✨
Maybe you’ve layered Glimmer Paper waves that shimmer like the sea, or colored your own SVGs with Stampin’ Blends for that perfect under-the-sea glow.
Or perhaps you’ve started a family photo tradition just like ours—the kind that makes every Disney trip a story worth scrapping! 🐚💖
I’d love to see how you bring your own ocean magic to life!
Share your layout in the Members Gallery so we can celebrate your creativity and keep the Disney magic alive—one glittery layout at a time. 🌊✨
🧜♀️ Final Thoughts — A Layout That’s Fin-tastic from Start to Finish

Scrapbooking isn’t just crafting—it’s storytelling with sparkle. ✨ Each page we make is a little time capsule of who we were, what made us laugh, and how much love fits inside one photo frame.
This 12×12 Disney-Inspired Little Mermaid layout captures more than glimmer paper and shimmer—it captures growth, laughter, and the moment my too-cool-for-Ariel kiddo turned into a ride buddy for life. 🥰 Every sparkle on this page reminds me that sometimes the smallest traditions (like one photo in front of a ride) become the biggest parts of our family story.
As the waves glisten across this layout, I can still hear the music, feel that hand in mine, and remember the exact moment we went under the sea together—finally! It’s a reminder that every “maybe next year” can turn into a forever memory when we take the time to craft it. 💖
So until next time, keep calm and mermaid on! May your glue dry clear, your shimmer stay shiny, and your memories stay magical. 💖🌊✨
💖 April – This Chick Loves Paper
Grab Your Supplies & Get Crafting!:

📸 All photos are subject to copyright ThisChickLovesPaper.com
Images © Stampin’ Up!
The content in this blog is the sole responsibility of April Raine - This Chick Loves Paper as a Stampin’ Up!® Independent Demonstrator. The use of and content of classes, services, or products offered is not endorsed by Stampin’ Up!®
12x12 single-page Disney-Inspired Little Mermaid scrapbook layout featuring one photo, glimmer paper waves, Cricut® SVG elements, and Stampin’ Up! bundles — created by This Chick Loves Paper. Follow the full step-by-step tutorial to craft your own sparkly under-the-sea Disney memory that shimmers with magic! 🧜♀️✨


Comments