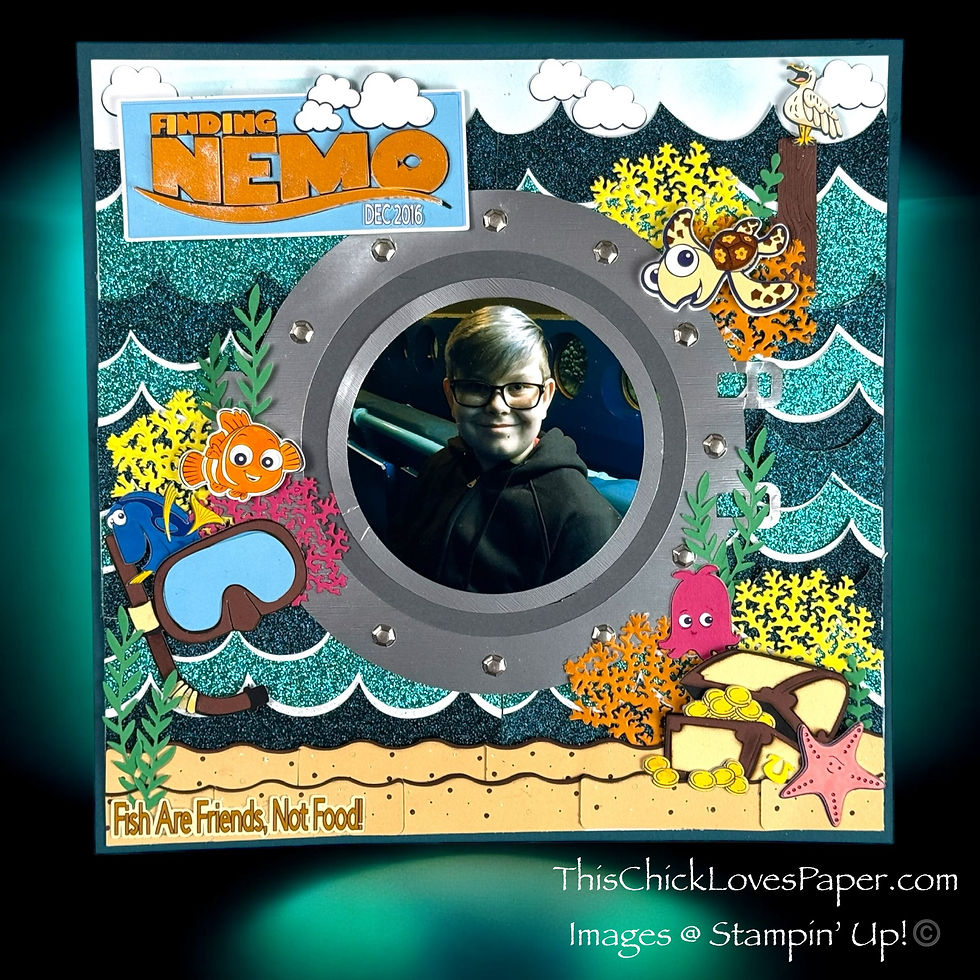
✨⚓🐠 Scene Building a Finding Nemo Scrapbook Layout: Our First Disneyland Ride ✨⚓🐠
- This Chick Loves Paper

- Apr 30, 2025
- 5 min read

Have you ever had a photo that technically wasn’t “perfect,” but the memory behind it made it absolutely priceless?
This 12x12 single-page Finding Nemo scrapbook layout proves exactly why we scrapbook the story, not just the picture.
This was our very first trip to Disneyland, and our very first ride ever…
Finding Nemo Submarine Voyage!
It was still called Magic Hour back then (yes, a real hour for hotel guests, not just 30 minutes like now!). The park was nearly empty, and we first headed toward the Matterhorn — but it wasn’t ready yet. So we wandered down toward the lagoon… and that’s how Nemo became our first official Disneyland memory!
Inside the submarine, the lighting was super dim — and while the photo came out a little dark, this moment still deserved a full-blown, sparkle-tastic scrapbook layout!
Scene building is one of my favorite ways to turn tricky photos like this into a scrapbook layout I absolutely love. When you surround the memory with texture, layers, and story-driven elements, even the most “meh” photo starts to shine.
Because when you build a full scene around your memory, you can turn ANY photo into pure magic.
How Our Finding Nemo Layout Idea Came to Life!
This page was inspired by one simple idea:
“Ever wonder what the fish see when they peek back at us?”
(Probably two very excited — and slightly weird-looking — humans pressed against the glass!)
I wanted to flip the perspective a little and create a scrapbook layout that showed not just what we saw — but what the fish saw!
Dive Into the Creative Materials Behind This Layout!
✂️ Cardstock:


• Pretty Peacock Cardstock – Hollowed Border
• Early Espresso Cardstock – Diver Mask, Log, Treasure Chest (SVGs)
• CTMH Shortbread Cardstock – Sand
• Pumpkin Pie Cardstock – Title letters and Coral
• Melon Mambo Cardstock – Coral, Pearl
• Daffodill Delight Cardstock – Coral
• Garden Green Cardstock - Seaweed
• White Willow Cardstock – Clouds and Waves
Specialty Papers:


• Brushed Silver Specialty DSP – Porthole
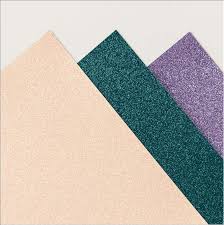
• Glimmer Paper – Waves
⚙️ Embellishments: Dies & SVGs:


• Disney SVGs (Design Space®) – Nemo, Dory, Squirt, Seagull, Pelican, Diver Mask, Treasure Chest, Title
• Otterly Amazing Dies – Seaweed + Log
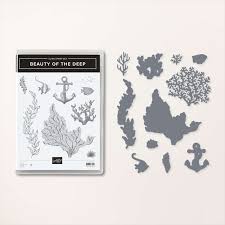
• Beauty of the Deep Dies – Coral
• Industrial Trinkets – Porthole Bolts
✍️ Inks & Coloring:
• Stampin’ Blends Markers – SVG Coloring
• Early Expresso Classic Stampin’ Pad + Sponge Daubers – Edge Inking
• CTMH Clear Shimmer Brush – Sparkle Accents
• CTMH Glacier Ink + Blending Brush – Soft Sky
✂️ Tools:


• Foam Tape, Multi-Purpose Glue, Adhesive
Scene Building This Finding Nemo Scrapbook Layout -Layer By Layer!

Before I started cutting into my paper,
I designed the entire scrapbook layout in Cricut Design Space® first.
I often do this to:
• Visualize the full layout before committing,
• Figure out measurements for photo mats, waves, and clusters,
• Test how everything looks together without wasting any paper!
On occasion, if I don’t have a stamp or dies that match my theme,
I’ll utilize SVG files from Design Space to build out elements.
Once I finalize the design, I cut all my shapes using Stampin’ Up! DSP, cardstock, and specialty papers — bringing the digital vision to real paper magic!
Here’s how the magic came together, layer by layer:
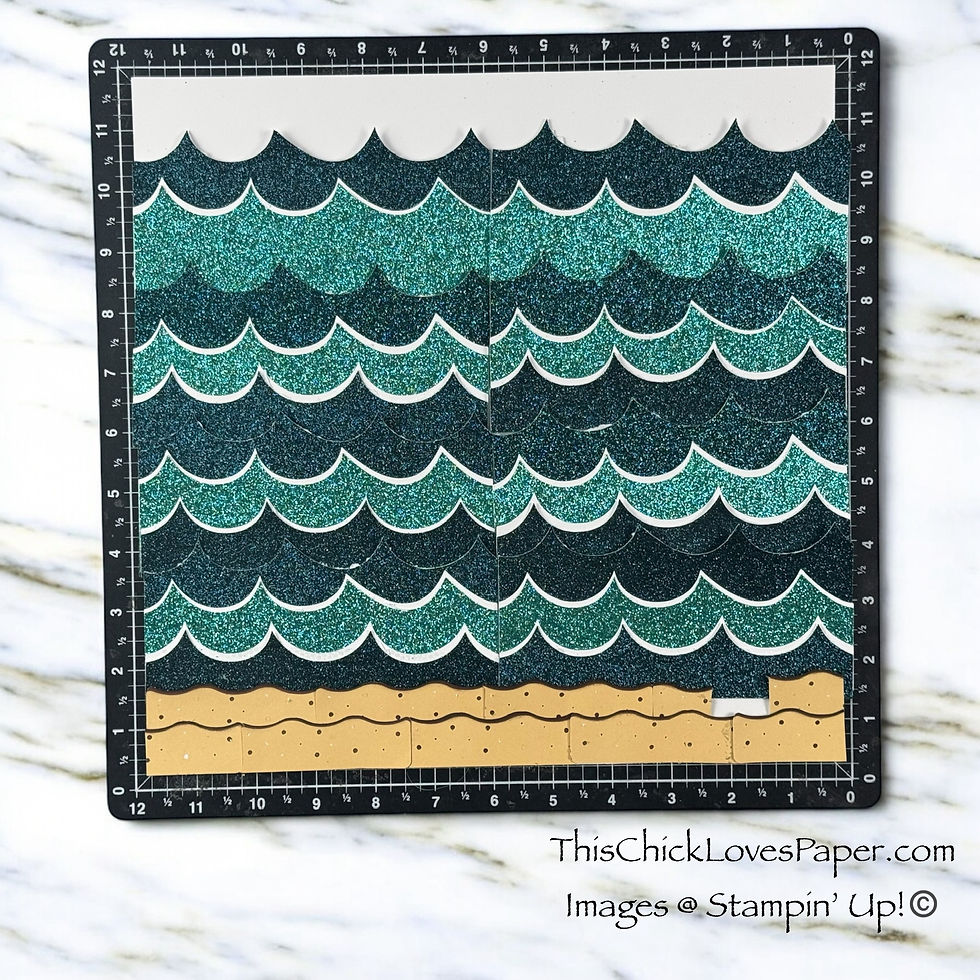
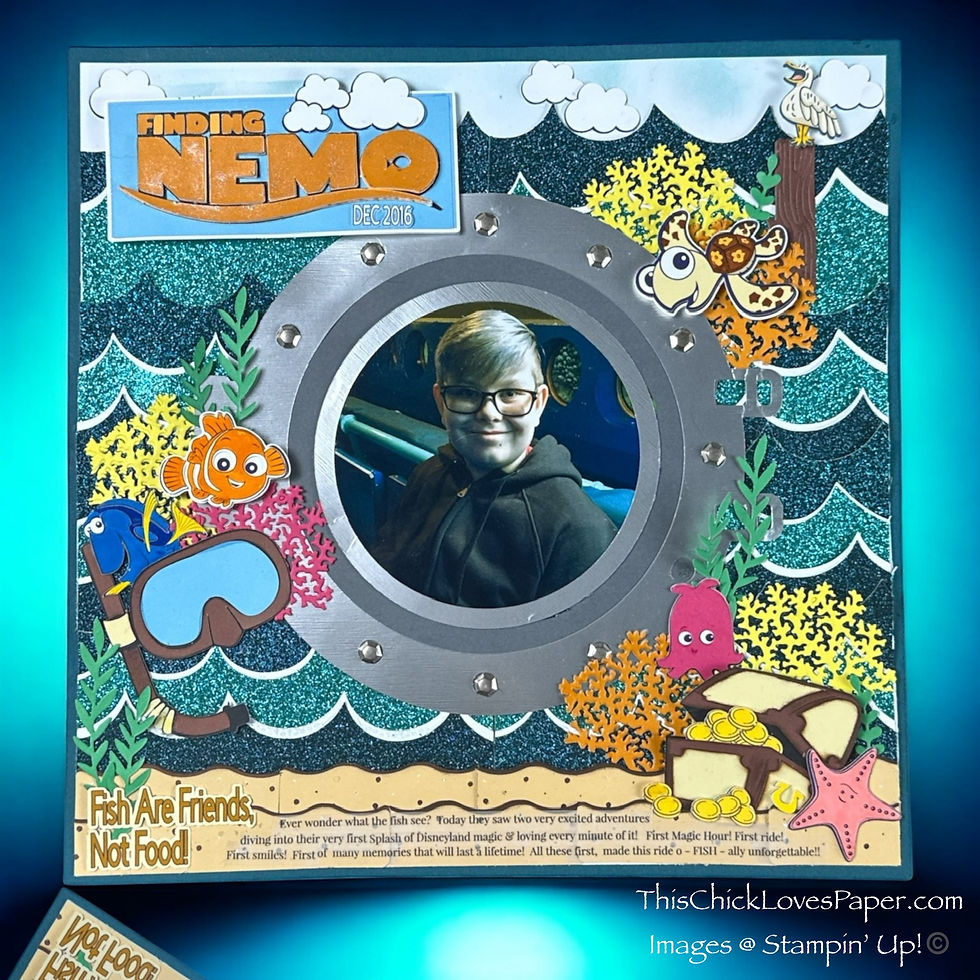
1️⃣: Building the Base
• First up: Pretty Peacock border, hollowed out to reduce bulk.
• Topped with a White Willow cardstock base.
• Added Glimmer Paper waves cut with my Cricut (Pretty Peacock + second blue shade).
• Created the sandy ocean floor using CTMH Shortbread and Stampin’ Up! Early Espresso cardstock.
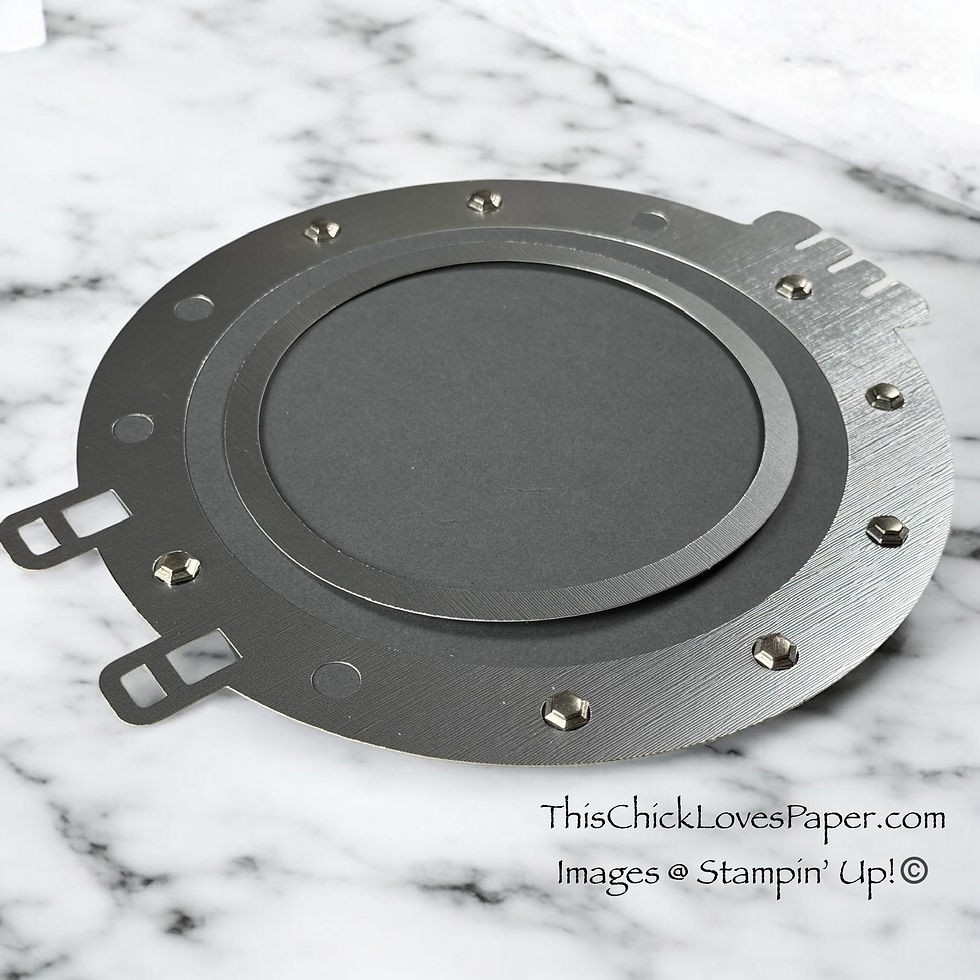
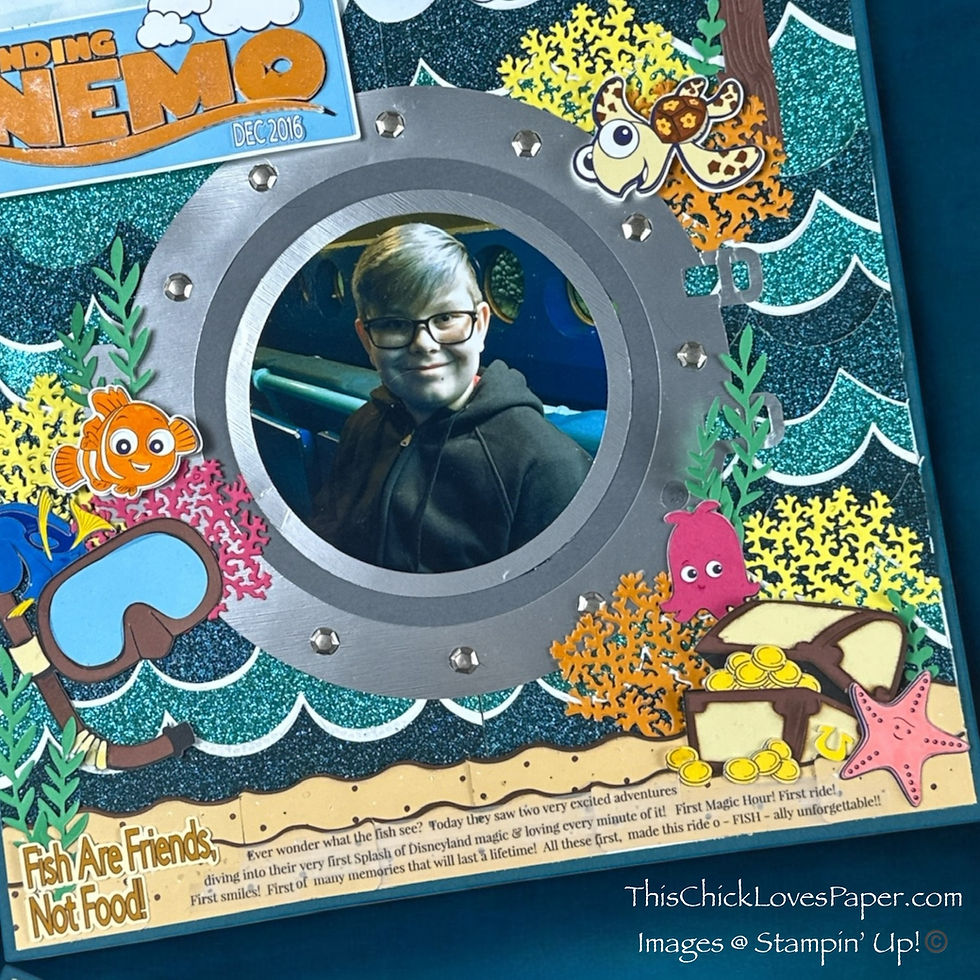
2️⃣: Creating the Porthole Window
• Cut the porthole frame from Brushed Silver Specialty DSP for a realistic submarine look.
• Added Industrial Trinkets as bolts around the window.
• Adhered the porthole frame directly to the center of the page.
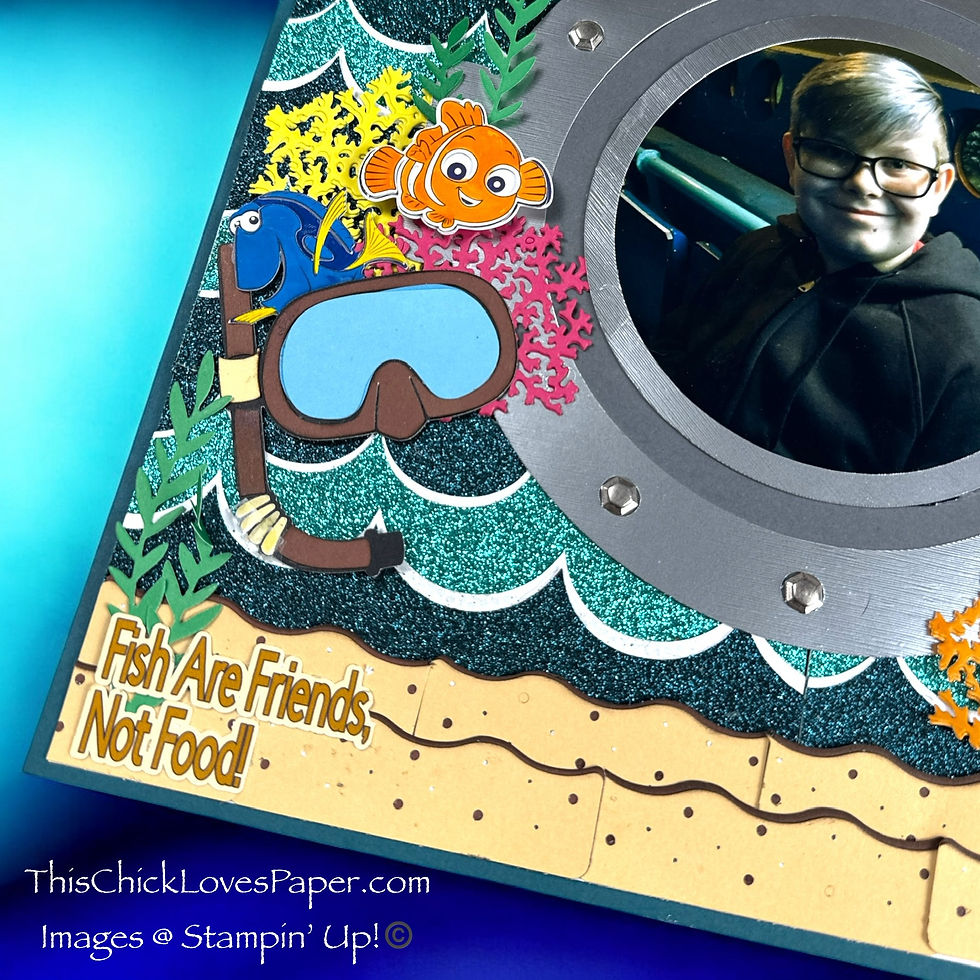
• Added the center photo (4.5” x 4.5” circle) inside the porthole for full immersion!

3️⃣: Scene Building with Coral
• Die-cut coral (Beauty of the Deep Dies) in Lemon Lolly, Pumpkin Pie, and Melon Mambo.
• Cut seaweed and the log (Otterly Amazing Dies) from Garden Green and Early Espresso cardstock.
• Built three clusters, carefully positioning the colors so that each cluster was balanced and cohesive across the page.
4️⃣: Custom Character Coloring
• SVGs were cut in white and colored by hand with Stampin’ Blends markers to create rich shading and depth.
• Pearl and Starfish were cut directly from colored cardstock for simplicity.
• Titles and some of the sea creatures were layered to add extra thickness, dimension, and a polished, professional finish.
5️⃣: Pop-Up Magic
Elements popped with foam tape for extra dimension:
• Squirt the turtle
• Nemo
• Pelican
• “Finding Nemo” title
(Everything else was glued flat to maintain balance and natural scene flow!)
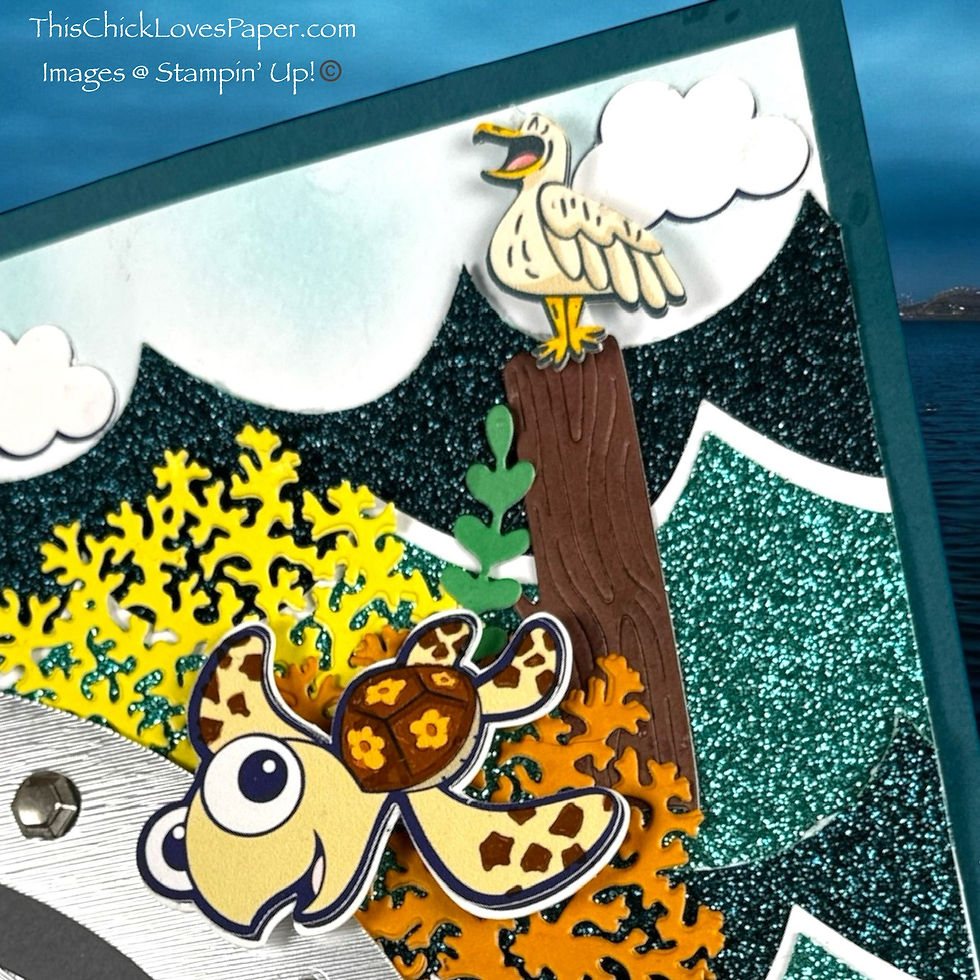
6️⃣: Above the Surface Details
• Blending the Sky - CTMH Glacier Ink + Blending Brush
• Added a log (Early Espresso cardstock) peeking vertically through the waves.
• White Willow clouds floated into the scene to clearly show the surface above water.
• Positioned the pelican on top (Mine, mine, mine!) and popped him up with foam tape for playful storytelling.
7️⃣: Shimmer & Sparkle Finishing Touches
• Used the CTMH Clear Shimmer Brush to add sparkle ONLY to:
• The coins inside the treasure chest
• The letters in the “Finding Nemo” title
8️⃣: Final Personal Touches
• In the bottom left corner:
“Fish are friends, not food.”
• Just enough space for journaling tucked right into the sand! It reads:
“This adventure was "o-fish-ally unforgettable!”
(And yes — that pun makes me so happy every time I read it!)
Dive Deeper into More Scrapbooking Magic!
💫 💫
Want even more ideas for bringing your memories to life with scene-building magic?
Dive into more personalized layouts, creative scene designs, and storytelling adventures here:


📸 Show Off Your Splash-Tastic Layouts!
Have you ever scrapped a “not-so-perfect” photo into a picture-perfect memory?
I’d love to see it!
Share your layouts in the Members Gallery ➔ — and let’s inspire each other to make magic out of every moment!
🌊 Final Wave of Magic
This layout started with a photo I almost didn’t use — too dark, too tricky, too stuck inside a submarine. But instead of tossing it aside, I challenged myself to build a scene around it. That’s the magic of crafting: you can take a photo that’s not “perfect” and still tell a story that is. With every element — from the SVG characters I colored myself, to the glimmer paper waves and brushed silver porthole — the memory came back to life in a way that was bigger than the photo alone. Scene building let me scrapbook what it felt like, not just what it looked like. And now, this imperfect little photo? It’s one of my favorite layouts ever.
Happy scrappin’ — one splash at a time!
April – This Chick Loves Paper
🛒 Grab Your Supplies & Start Crafting!
All photos and projects are subject to copyright
Images © Stampin’ Up!
The content in this blog is the sole responsibility of April Raine – This Chick Loves Paper as a Stampin’ Up!® Independent Demonstrator. The use of and content of classes, services, or products offered is not endorsed by Stampin’ Up!®.
This 12x12 single-page Finding Nemo scrapbook layout captures our first Disneyland ride and shows how scene building, SVGs, and glimmer paper brought a dark photo to life. Explore more at This Chick Loves Paper!


Comments