
🍪 Gingerbread Man Bakery-Themed Christmas Card Tutorial | Gingerbread Man + Homemade Treats Bundles
- This Chick Loves Paper

- Nov 26, 2025
- 9 min read
Updated: Dec 16, 2025

If you caught my last blog, you already know about my neighbors — the unofficial mayors of Cookie Lane — who bake their way through Christmas like it’s an Olympic event. 🎅🍪 I started this “Bakers Bundle” of cards so they’d have something cute to slip in with their treats… but the first batch was so sweet, I had to bake a sequel.
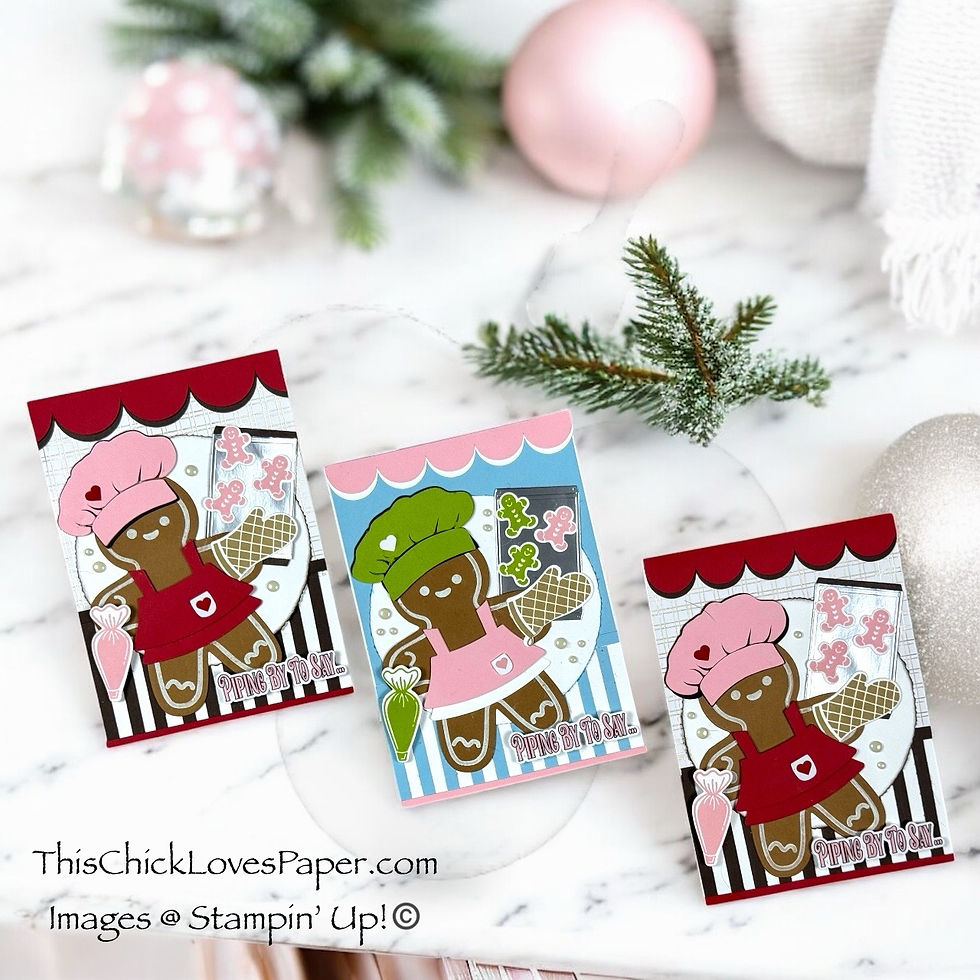
And when I say sweet, I mean Gingerbread Bakery sweet! These cards share one layout but totally different flavor profiles — one rich and cozy with Real Red, Early Espresso & Pretty in Pink, the other bright and candy-coated with Balmy Blue, Granny Apple Green & Pretty in Pink.
This project is full of happy accidents, clever layers, and colors that’ll make you want to preheat your craft room. So grab your apron — we’re about to whip up a batch of holiday magic!
🍪 What You Need for This 5 x 7 Gingerbread Bakery Christmas Card Tutorial
✨ Patterned Paper:


• Stampin’ Up!® Regal Distressed Patterns 12″ × 12″ Specialty Designer Series Paper (gold-and-white background for the bakery wall)
• Stampin’ Up!® Silver Foil Specialty Paper (12″ × 12″) — cookie trays
📄 Cardstock: Card One


• Stampin’ Up!® Thick Basic White Cardstock (8½″ × 11″) — card base, cut to 10″ × 7″, scored at 5″
•. Stampin’ Up!® Early Espresso Cardstock (8½″ × 11″) — awning stripes, scallop underlayer, and circle inking
•. Stampin’ Up!® Real Red Cardstock (8½″ × 11″) — scallop border, apron, and accent strip
• Stampin’ Up!® Pecan Pie Cardstock (8½″ × 11″) — gingerbread cookie base
📄 Cardstock: Card Two


• Stampin’ Up!® Thick Basic White Cardstock (8½″ × 11″) — card base, cut to 10″ × 7″, scored
• Stampin’ Up!® Pretty in Pink Cardstock (8½″ × 11″) — apron and accents on pastel version
• Stampin’ Up!® Balmy Blue Cardstock (8½″ × 11″) — deckled circle edge and pastel background tone
• Stampin’ Up!® Granny Apple Green Cardstock (8½″ × 11″) — pastel accents and gingerbread details
• Stampin’ Up!® Pecan Pie Cardstock (8½″ × 11″) — gingerbread cookie base
🎨 Stamps, Dies & Bundles:


• Stampin’ Up!® Gingerbread Man Bundle
• Stampin’ Up!® Homemade Treats Bundle
• Stampin’ Up!® Deckled Circle Dies
🎨 Inks & Coloring:

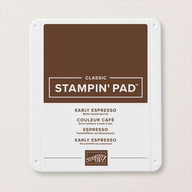


• Stampin’ Up!® Early Espresso Classic Stampin’ Pad — inking and distress edges
• Stampin’ Up!® Pretty in Pink Classic Stampin’ Pad — stamping mini gingerbread men & pipping bag
• Stampin’ Up!® Granny Apple Green Classic Stampin’ Pad — stamping mini gingerbread men & pipping bag
• Stampin’ Up!® Crumb Cake Classic Stampin’ Pad — stamping oven mit
• Close To My Heart White Daisy Ink — gingerbread details
🧰 Tools:

• Stampin’ Up!® Paper Trimmer
• Stampin’ Up!® Bone Folder
• Stampin’ Up!® Take Your Pick Tool
• Sponge Daubers — for edge inking
• Stampin' Up! Simply Shammy - easily cleans ink from narrow grooves on your stamps
⭐ Other Tools I Use in My Projects
*As an Amazon Associate, I earn from qualifying purchases.


Cricut® Essentials
• Cricut® Maker 3 — my primary cutting machine for titles, SVGs & embellishments
• Cricut® StandardGrip 12×12 Mat — 3 count used for cardstock, photo paper & labels
Printer
Canon® Printing System (Photos + Printable Cricut Elements)
• Canon TS9521C Crafting Printer — used for ALL printed project photos, journaling pieces, print-then-cut embellishments & titles
Photo Papers
• Canon Photo Paper Plus Glossy II (4×6, PP-301) → For 4x6 or smaller - printed photos
• Canon Matte Photo Paper (MP-101, 8.5×11) → Used for Cricut print-then-cut elements & titles
• Canon Double-Sided Matte Photo Paper (MP-101D, 8.5×11) → Also used exclusively for Cricut embellishments, icons, & layered pieces
Printer Ink
• EZ Ink Compatible 280XXL/281XXL Ink Pack → The exact ink set used for the TS9521C
Stamping & Precision Tools
• MISTI® Memory Size with 12-1/2" x 12-1/2" Stamping area — for borders, backgrounds & oversized stamping
• MISTI® Stamp Tool Bar Magnet - Additional magnet
Speciality Adhesives
• Tombow® Mono Aqua Liquid Glue — for corners, details & layered paper pieces
• Bearly Art Precision Craft Glue (4oz Original) — for embellishments & fine-detail gluing
• Tombow® Mono Air Touch Adhesive— my preferred tape runner for base
• Tombow® Mono Air Touch Adhesive, Refill 2-Pack — my preferred tape runner for base layers
Journaling Tools
• Avery® Easy Peel® Full-Sheet Clear Labels (8665) → Used for long typed journaling strips
• Avery® Clear Shipping Labels 2×4 (8663) → Used for short typed journaling strips or blocks
• Skaura Pigma Micron Fineliner Pens - Archival Black - Assorted Point Sizes - Used for handwritten Journaling
🍪 Mix, Layer & Sprinkle — The Sweet Steps Behind the Card


Both cards follow the same layout recipe, but the colors serve up two completely different moods — one rich and warm, the other playful and pastel. Ready to start your own batch? Let’s bake!
🎨 Bake That Base! (Building the Perfect 5x7 Card Foundation)

Every great cookie starts with the dough — and every great card starts with a clean, crisp base. Cut your Thick Basic White cardstock to 10” × 7”, then score at 5” along the long edge.
Pro Tip: Fold away from your score line, not into it. That tiny detail makes the fold smooth, clean, and pro-level perfect.
Next, grab your gold-and-white DSP and cut it to 5” × 4½”. Adhere it flush to the top edge of your base.
This is your “bakery wall.”
Then, slice ten strips of Early Espresso cardstock to ¼” × 2¼” and line them horizontally beneath your DSP panel like a striped awning. I spaced each of these strips a ¼” apart.
Finish it off with a 5” x ¼” Early Espresso strip across the top for that perfect café vibe.
🍒 Frost That Frame! (Scallops, Borders & a Dash of Cricut Magic)

Now for the icing on the (paper) cake. Using your Cricut, cut a scalloped border in Real Red with an Early Espresso underlay.
Layer those two pieces to create rich depth and dimension — your bakery’s “roofline” is officially open for business!
Slice a slim strip of Real Red cardstock (about ⅛” wide) and lay it horizontally across the bottom of the card. That tiny accent ties the color palette together and makes the whole card look designer-tier polished.
Then, grab your Deckled Circle Die closest to your card’s width — around 4½” — and cut it out. Ink the edges with Early Espresso for the red version, or Balmy Blue for the pastel one. The inking frames your circle and makes it glow like a warm cookie fresh from the oven.
🍰 Roll Out the Dough — Stamping, Layering & Sweet Details That Pop

Let’s bake some gingerbread! Stamp your Gingerbread Man on Pecan Pie cardstock using White Daisy ink. I like to double-stamp mine in a MISTI for that perfect, frosted contrast.
For the piping bag and oven mitt, I used Pretty in Pink on the red card and Granny Apple Green for the pastel one.
Die cut all your images, then move over to Cricut to cut the baker’s hat and apron.
I used Pretty in Pink and Real Red for these layers and added a bold black outline behind the hat to give it definition. The groove lines show through perfectly, making it look hand-piped!
Pro Tip: Double-layer your apron pieces — it gives instant 3D lift without using foam tape.
🧁 Mistakes, Magic & Frosted Fixes — How One Apron Accident Became Iconic
Now here’s the part that proves even pros get happy accidents. 😅 When I first made the apron, I didn’t make it long enough to cover my gingerbread girl’s tummy! Instead of scrapping it, I tucked a second piece behind it… and boom — instant ruffle apron!
It turned out so adorable that I repeated it on both cards. For the red apron, I doubled up the Real Red cardstock; for the pink version, I layered Pretty in Pink over White. Sometimes the best designs aren’t planned — they just rise to the occasion. 💁♀️
Pro Tip: Never throw away a crafting “oops.” Nine times out of ten, it’s just waiting to become your next signature move.
If you have Design Space, you can grab the hat & apron here:
💬 Say It With Sugar — Crafting the Perfect Piping Pun
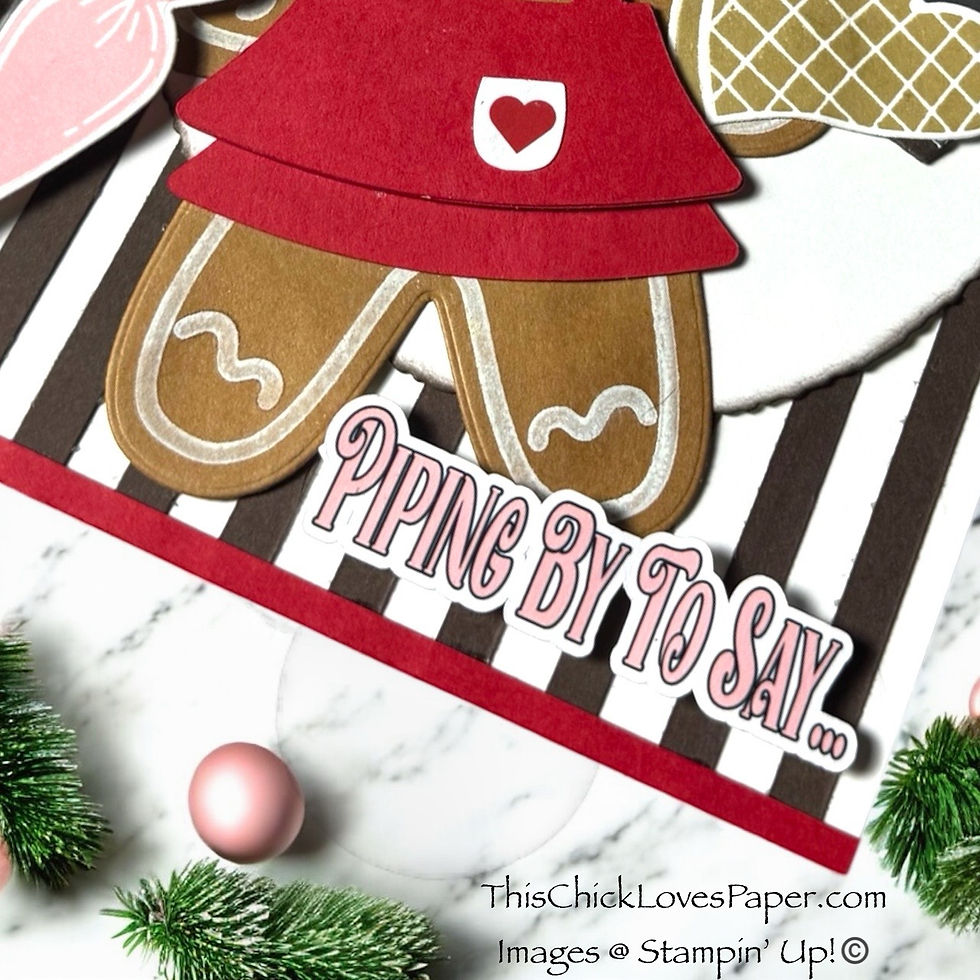
Every bakery needs a sign, right? None of my stamps fit the layout spacing, so I created my own sentiment in Design Space and cut it out with my Cricut.
“Piping By To Say…”
It ties perfectly to the baking theme and the piping bag she’s holding. I popped both the sentiment and the piping bag up with foam tape for dimension, while leaving the rest of the pieces flat. The stacked cardstock already adds lift — no need to bulk up your envelopes.
Pro Tip: For dimension that mails like a dream, stack multiple die cuts instead of foam tape — same lift, zero postage drama.
🎀 Two Flavors, One Recipe — The Card That’s Equal Parts Cozy & Cute


And there you have it! Two perfectly baked cards from one layout recipe. The Real Red version feels like Christmas morning at a hometown bakery, while the Balmy Blue & Granny Apple Green card serves pastel sugar-shop realness.
Each has just enough sparkle and texture to make your cookies jealous. From the striped counter & awnings to that cheeky little ruffle apron, these cards deliver cozy nostalgia with a side of sass.
🍭 Craving More Creative Calories? Explore My Holiday Treat Line-Up
If this Gingerbread Bakery Christmas Card has your creativity buzzing like a sugar rush, you’ll love the rest of my dessert-inspired lineup! Think peppermint patterns, candy-coated layouts, and sweet holiday details that look good enough to eat.
Keep your glue gun plugged in — we’re just getting started!


📸 Show Off Your Sugar & Shine — Join the Members Gallery Bake-Off

I’d love to see your spin on this gingerbread cutie! 🍪
Whether your style is bright and modern or sweetly nostalgic, the Members Gallery is the perfect place to share your handmade creations.
Think of it as our virtual cookie swap — a space to celebrate layers, laughter, and a whole lot of glitter. ✨
So grab your camera, snap your masterpiece, and click the Share Your Creation button below to join the fun!
Who knows — your card might inspire the next batch of bakers to whip up their own holiday magic! 💕
💥 The Final Whisk — Craft Boldly, Bake Bravely, and Keep It Sweet

Every once in a while, a card comes along that feels like it was meant to be — little accidents, happy colors, perfect puns, and plenty of joy. This was one of those projects.
So grab your supplies, throw on your craft apron, and remember: whether you’re piping frosting or layering cardstock, it’s all made better with a little heart, a little humor, and a whole lot of glitter. ✨
Because around here, we don’t just make cards — we bake memories one layer at a time. 💕
Stay tuned — the next batch of crafty inspiration is already in the oven!
April – This Chick Loves Paper
🛒 Grab Your Supplies & Get Crafting

All photos and projects are subject to copyright © ThisChickLovesPaper.com.
Images © Stampin’ Up!®
The content in this blog is the sole responsibility of April Graziano, Independent Stampin’ Up!® Demonstrator. The use of and content of classes, services, or products offered is not endorsed by Stampin’ Up!®
Whip up a handmade 5x7 Gingerbread Bakery Christmas Card using the Gingerbread Man and Homemade Treats Bundles in this festive tutorial from This Chick Loves Paper!
🍪 Follow April’s sweet, step-by-step guide packed with playful color combos, beginner-friendly tips, and plenty of frosting-fueled fun to make your holidays shine.
⭐How I Protect My DSP, Cardstock & Finished Cards

I store my DSP, cardstock, scraps, and even finished cards in these clear resealable bags.
The 2-mil thickness is perfect for everyday crafting (they make a 4-mil option if you want extra durability!), and they’re tough, reusable, and great for keeping your entire crafting stash clean, tidy, and protected from the chaos of the craft room.
*As an Amazon Associate, I earn from qualifying purchases.
• 13×13 Plymor 2mil Zipper Reclosable Bags — for 12×12 DSP, cardstock sheets & scraps
• 9×12 Plymor 2mil Zipper Reclosable Bags — for 8.5×11 cardstock & scraps
• 6x8 Plymor 4mil Heavy Duty Reclosable Bags — for storing extra die cut embellishments & finished cards, card workshop kits


Comments