
How to Make a Jurassic Park-Inspired Birthday Card Featuring Industrial Textures and Layered Die Cuts 🦖❤️
- This Chick Loves Paper

- 5 days ago
- 9 min read

My little man turned 22 this week, and if you've followed This Chick Loves Paper for any length of time, then you already know there was only one theme this card could possibly be.
Dinosaurs have been his thing since he was little. In kindergarten, his class was asked to bring something that started with the letter "A" for show-and-tell. Most kids showed up with apples and airplanes. My son? He proudly brought an Allosaurus and knew more dinosaur facts than most adults!

A few years later, he dressed up as Dr. Alan Grant for a school character day, which eventually led to a Jurassic Park-inspired birthday party.
Fast forward to today, and not much has changed. He still loves the movies, still gets Jurassic Park gifts for birthdays and Christmas, and even has multiple dinosaur tattoos. (Not. a fan of tattoos, but they do look good)!
So when it came time to create his 22nd birthday card, I knew exactly where to start.
This Jurassic Park-inspired birthday card combines industrial metal textures, caution-striped details, jungle foliage, and a roaring dinosaur focal point to create a design that feels like it came straight from a dinosaur containment facility.
And honestly? Watching him open it was almost as fun as making it.
Everything You Need to Build This Jurassic Park-Inspired Birthday Card
Before we start building our dinosaur containment facility, let's gather our supplies. Trust me, it's much easier to prepare everything now than it is to go searching for leaves and industrial trinkets while a T-Rex is on the loose! 🦖
Stamps, Dies & Bundles


Close To My Heart Splatter Stamp – creating the splatters on the distressed caution stripe background
Stampin' Up! Deckled Circles Dies – cutting the circular window and metallic frame
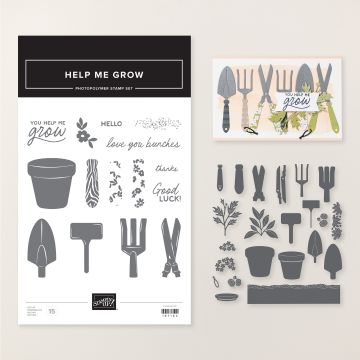
Stampin' Up! Help Me Grow Bundle – foliage and greenery accents.
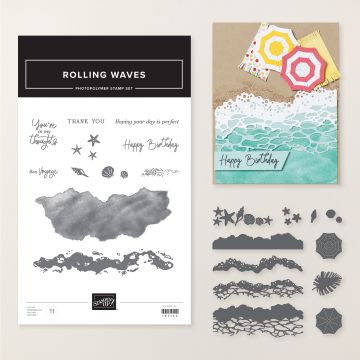
Stampin' Up! Rolling Waves Bundle – tropical leaves and jungle-inspired accents

Cardstock
Stampin' Up! Basic Black 12X12 Two-Tone Cardstock – embossed herringbone focal layer
Stampin' Up! Crushed Curry 8-1/2"x11" Cardstock – distressed caution stripe background
Stampin' Up! Mossy Meadow 8-1/2"x11" Cardstock – die-cut foliage and jungle accents
Stampin' Up! Garden Green 12x12 Two-Tone Cardstock – die-cut foliage and jungle accents
Stampin' Up! Basic Black 8-1/2"x11" Cardstock – card base, caution stripe background layer
Specialty Paper
Stampin' Up! Lunar Luster Specialty Paper – industrial metal panel and embossed circular frame

Embossing Folders
Stampin' Up! Metal Plate 3D Embossing Folder – industrial metal texture
Stampin' Up! Modern Herringbone 3D Embossing Folder – tire tread-inspired texture behind the focal image
Ink
Stampin' Up! Mossy Meadow Classic Stampin' Pad – adding definition and shading to the foliage
Embellishments
Stampin' Up! Industrial Trinkets – bolts and industrial hardware details
Tools

Stampin' Up! Stampin' Cut & Emboss Machine – embossing and die cutting
Stampin' Up! Paper Trimmer – cutting cardstock and specialty paper
Stampin' Up! Bone Folder – creating crisp folds
Stampin' Up! Detail Scissors – distressing the edges of the caution stripes
Stampin' Up! Take Your Pick Tool – placing embellishments.
Cricut® & Other Essentials
*As an Amazon Associate, I earn from qualifying purchases.


• Cricut® Maker 3 — my primary cutting machine for sentiments & embellishments
• Canon Double-Sided Matte Photo Paper (MP-101D, 8.5×11) → Also used exclusively for Cricut embellishments, icons, & layered pieces
👉 Perfect for clean, detailed adhesion on small die-cut pieces
• Canon Matte Photo Paper (MP-101, 8.5×11) → Used for Cricut print-then-cut elements & titles
Here's How To Build Your Own Dinosaur Containment Facility

Now that we have our supplies gathered, it's time for the fun part! This Jurassic Park-inspired birthday card may look like it escaped from a high-security dinosaur containment facility, but don't worry... It's much easier to build than it looks.
We'll start with the caution-stripe background, then layer in the industrial metal textures, jungle foliage, and dinosaur-themed focal elements to create a birthday card that's dino-mite from top to bottom. 🦖
Let's get started!
Start With the Caution-Stripe Card Base

To create the card base, cut a piece of Stampin' Up! Basic Black Cardstock to 10" x 7". Score at 5" on the 10" side, then fold and burnish with a Bone Folder to create a 5" x 7" card base.
Next, cut a piece of Stampin' Up! Crushed Curry Cardstock to 5" x 7". Using a Close To My Heart Splatter Stamp and black ink, randomly stamp splatters across the panel in a loose diagonal direction. I kept the stamping a little uneven and did not over-ink the stamp because I wanted the background to feel worn, rustic, and slightly roughed up.

Once the splattered panel was finished, I trimmed it into 1/2" diagonal strips. Before adhering the strips to the card base, I used Paper Snips to lightly rough up some of the edges. Then I dragged the edges directly across my black ink pad to add even more distressing.
Finally, I adhered the distressed Crushed Curry strips to the front of the Basic Black card base, leaving space between each strip so the black cardstock showed through.
Pro Tip: Stamp the splatters before cutting the Crushed Curry panel into strips. That way, the splatter pattern carries over across the pieces and looks more like worn caution tape rather than separate decorated strips.
Step 2: Create the Distressed Metal Panel

Cut a piece of Stampin’ Up! Lunar Luster Specialty Paper to 4” x 6”. Run the paper through the Stampin’ Cut & Emboss Machine using the Stampin’ Up! Metal Plate 3D Embossing Folder.
To give the panel a worn industrial appearance, lightly drag a black ink pad along the edges. I also added a little ink randomly across portions of the embossed surface to create a weathered metal effect.
Once you are happy with the look, center the panel on the front of the card and adhere it.
Pro Tip: Perfection is not the goal here! A few unevenly inked areas actually help create the appearance of scratched, aged metal.
Step 3: Build the Tire Track Focal Point

Cut a piece of Stampin’ Up! Basic Black Two-Tone Cardstock to 4” x 4”.
Using your Paper Snips, gently rough up the edges of the cardstock to create a distressed look.
Next, run the panel through the Stampin’ Cut & Emboss Machine using the Stampin’ Up! Modern Herringbone 3D Embossing Folder. The pattern reminded me of a tire track, which felt perfect for this Jurassic Park-inspired birthday card.
Lightly drag black ink around the edges to enhance the texture and make the embossing stand out even more.
Step 4: Create the Metal Window Frame

Using the Stampin’ Up! Deckled Circle Dies, cut a large circle from the Lunar Luster Specialty Paper.
Run the circle through the Metal Plate 3D Embossing Folder to coordinate with the background panel.
Just as before, lightly ink the edges with black ink to create a distressed industrial finish.
Add foam adhesive to the back of the circle and adhere it to the center of the embossed tire-track panel.
Pro Tip: Adding the foam adhesive helps separate the layers and gives the illusion that the dinosaur is breaking through a reinforced metal containment window.
Step 5: Create and Layer the SVG Elements

Using Cricut Design Space, cut the following elements:
Jurassic Park-inspired logo
Dinosaur image
Warning sign
Happy Birthday sentiment
Number 22
To add extra dimension, cut multiple layers of each piece and stack them together before adhering.
The layered pieces create a chipboard-style effect that helps the embellishments stand out against the busy background.
Pro Tip: If you’re already spending time cutting SVGs, cut a few extra layers while everything is loaded on the mat. Stacking them only takes a few extra minutes and creates incredible dimension.
Step 6: Add the Jurassic Jungle Details

Using the Stampin’ Up! Help Me Grow Bundle and Stampin’ Up! Rolling Waves Bundle, die cut several leaves from Stampin’ Up! Mossy Meadow Cardstock and Stampin’ Up! Garden Green Cardstock.
Ink the edges using Stampin’ Up! Mossy Meadow Classic Stampin’ Pad to add depth and definition.
Tuck the leaves behind the circular frame until you are happy with the arrangement.
Step 7: Assemble the Card Front

Before adhering anything, I dry-fit all of the pieces on the card front.
I moved things around until I was happy with the placement and the overall balance of the design.
Once everything is positioned, I adhered the dinosaur focal point, logo, sentiment, warning sign, and additional leaves.
One of my favorite details was a small leaf tucked near the warning sign, & the logo almost looks like a dinosaur claw peeking out from behind.
Step 8: Add the Finishing Hardware

To complete the industrial theme, add Stampin' Up! Industrial Trinkets around the circular frame and in the corners of the metal panel. I used my Stampin' Up! Take Your Pick Tool to help position the trinkets exactly where I wanted them before adhering them.
For adhesive, I used Bearly Art Precision Craft Glue, which made it easy to apply a small amount of adhesive without it seeping out from underneath the embellishments.
These little details help reinforce the appearance of a reinforced containment hatch and tie the entire design together.
At this point, the Jurassic Park-inspired birthday card is officially ready to roar! 🦖
🦖 Mission Accomplished! The Dinosaurs Have Escaped, and the Card Is Complete!

And there it is! Your Jurassic Park-inspired birthday card has officially made it out of the containment zone. Between the caution-stripe background, distressed metal textures, tire-track details, layered SVG embellishments, jungle foliage, and industrial hardware accents, this card is packed with personality from top to bottom. Best of all, it isn’t just another birthday card. It’s a handmade tribute to a lifelong dinosaur fan, filled with memories, inside jokes, and details chosen specifically for the person receiving it.
By the time you add that final trinket and step back to admire your work, you’ll have a card that feels bold, rugged, dimensional, and completely one-of-a-kind. And honestly? That’s what handmade cardmaking is all about. Taking a few sheets of cardstock, a little creativity, and a whole lot of heart, then turning them into something that will be remembered long after the birthday cake is gone. 🦖🎉💛🖤
🦕 Keep the Creativity Roaring
Love themed cards as much as I do? Be sure to check out the gallery below for even more character-inspired and detailed handmade card ideas. From favorite characters and movies to special celebrations and unique occasions, a few thoughtful details can transform a simple card into something truly unforgettable.
You never know where your next creative adventure might begin! 🎉🦖


🦖 Sound the Alarm... We Want to See Your Creations!

Did this Jurassic Park-inspired birthday card spark an idea of your own? Whether you created a dinosaur-themed card, used one of the products featured in this tutorial, or put your own spin on the design, I'd love to see it!
Be sure to share your project in the Members Gallery so our crafty community can celebrate your creativity, swap ideas, and inspire one another.
After all, every great creative adventure starts with a single sheet of cardstock. 💛🖤
🦖 A Roaring Good Way to Celebrate 22 Years

Looking back, it's funny how some things change while others stay exactly the same. From bringing an Allosaurus to kindergarten show-and-tell, to dressing up as Dr. Alan Grant in elementary school, to collecting Jurassic Park gifts as an adult, my son's love of dinosaurs has never gone extinct. That's exactly why this Jurassic Park-inspired birthday card felt so special to create.
Between the industrial textures, caution-stripe background, jungle foliage, and personalized details, this project became much more than a handmade birthday card. It became a celebration of memories, traditions, and the little things that make the people we love themselves uniquely.
Whether you're creating a card for a dinosaur enthusiast, a movie fan, or someone with a lifelong passion of their own, I hope this project inspires you to tell a story through your crafting and create something as unique as the person receiving it.
Until next time, keep creating, keep making memories, and remember... some passions never go extinct. 🦖💛
Happy crafting!
💖 April – This Chick Loves Paper
🛒 Grab Your Supplies & Start Crafting!

All photos and projects are subject to copyright © ThisChickLovesPaper.com.
Images © Stampin’ Up!® & CTMH®.
The content in this blog is the sole responsibility of April Raine – This Chick Loves Paper, Independent Stampin’ Up!® Demonstrator.
The use of and content of classes, services, or products offered is not endorsed by Stampin’ Up!®.
Create a bold Jurassic Park-inspired birthday card featuring industrial metal textures, caution stripes, jungle foliage, layered SVG elements, and dimensional details.
Follow this step-by-step tutorial to create a personalized, handmade card for the dinosaur lover in your life.


Comments