
💙✨ HOW TO MAKE A HANDMADE SYMPATHY CARD WHEN YOU’RE THE BRIGHT-&-CHEERY TYPE ✨💙
- This Chick Loves Paper

- Nov 3, 2025
- 10 min read
Updated: Dec 16, 2025

Because even in quiet moments, creativity has a way of shining through.
Let’s be honest… how do you even make a sympathy card?
I mean, y’all know me — my cards are usually brighter than a disco ball at a glitter convention. 😂 I live for sparkle, sass, and punchy colors, not “quiet reflection.” But when my Lil Man asked me to make a card for a coworker who’d suffered a loss, I suddenly found myself staring at my Secret Sea cardstock, wondering, Do I even own calm?
This was a big deal, though — not just because it was my first sympathy card, but because it was his third request for something handmade for his team. (First came the Flippin’ Awesome Burger Bistro cards 🍔, then those adorable Kit Collection Treat Boxes 🧁.) And now, this one — a card that needed to feel thoughtful, comforting, and full of heart. When your kid grows up to lead with kindness, you stop everything and craft with purpose. 💙
He wanted a 5″ × 7″ card with two big inside panels so everyone could write a personal note. Simple. Meaningful. Team-driven. And honestly? Watching him light up when he saw it — then asking me to text him photos — totally melted me.
Sure, it’s a little less confetti and a little more calm, but that’s what makes it special. It’s proof that even when life asks us to tone down the sparkle, creativity always finds a way to shine through. 🌙✨
Grab your coffee, your glue, and maybe a tissue or two — we’re crafting comfort, one cardstock layer at a time. 💙
📦 SUPPLIES YOU’LL NEED TO CREATE YOUR HANDMADE SYMPATHY CARD
DESIGNER SERIES PAPER

Stampin’ Up! Peaceful Garden 12” × 12” (30.5 × 30.5 cm) Designer Series Paper – Trimmed to 4½” × 6½” and cut diagonally to form the top and bottom panels.
CARDSTOCK


Stampin’ Up! Secret Sea 8½” × 11” Cardstock – Card base (cut to 10” × 7”, scored at 5”) and used again for the tag base and layered mats.
Stampin’ Up! Basic White 8½” × 11” Cardstock – For the first mat, dove die-cuts, and top sentiment tag.
Stampin’ Up! Cloud Cover 8½” × 11” Cardstock – For the embossed center panel and the stamped background layer.
INK
Stampin’ Up! Secret Sea Classic Stampin’ Pad – Used for all background stamping and to ink every mat edge. (No dauber or blending brush here — I gently tapped the cardstock edges right onto the pad. Those juicy SU! pads don’t need much pressure!)
STAMPS, DIES & EMBOSSING FOLDER


Stampin’ Up! Peace on Earth Dies – For the layered sentiment tags and white dove accents.
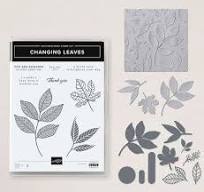
Stampin’ Up! Changing Leaves Hybrid Embossing Folder – Adds soft texture and movement to the Cloud Cover panel.
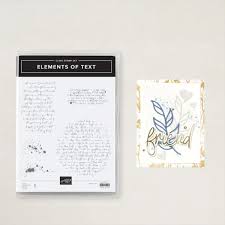
Stampin’ Up! Elements of Text Cling Stamp Set – Used to stamp the subtle text design on the Cloud Cover cardstock.
EMBELLISHMENTS
Stampin’ Up! Shimmer Star Foam Stickers – Three subtle, sparkly stars to finish the design with a gentle glow.
TOOLS & ADHESIVES


Stampin’ Cut & Emboss Machine – For die-cutting and embossing.
Stampin’ Seal, Multipurpose Liquid Glue, and Foam Adhesive – For clean, secure layers. (Only the doves are popped with foam adhesive; everything else is layered flat for that serene, polished finish.)
Paper Trimmer & Bone Folder – Because even heartfelt cards deserve crisp edges.
✂️ STEP-BY-STEP: HOW TO MAKE A HANDMADE SYMPATHY CARD
💙 STEP 1: BUILD THE BASE OF SERENITY

Start with a 10” × 7” piece of Stampin’ Up! Secret Sea 8½” × 11” Cardstock, scored at 5” to form a vertical card base.
Next, trim a Basic White mat to 4¾” × 6¾”. Before adhering it, we’re going to give it a little glow-up! Use your trimmer to hollow out the center of the mat by cutting a ½” border all the way around the inside, then pop that center piece out.
💡 Why hollow it out? This trick keeps your card from getting too bulky once you start layering — and bonus — that center cutout is the perfect piece to reuse for your tag embellishment & dove die-cuts. Talk about smart crafting!
Now, before adhering the mat, ink up those edges using your Secret Sea Classic Stampin’ Pad. No sponge dauber or blending brush needed — just gently tap the cardstock edges directly on top of the ink pad. Those juicy Stampin’ Up! pads do all the work for you!
Pro Tip: Don’t drag or press. Just “kiss” the edges of the pad for that soft hint of color — think of it as edge-highlighting, not edge-painting. 💋
💙 STEP 2: CREATE THE DIAGONAL BACKGROUND
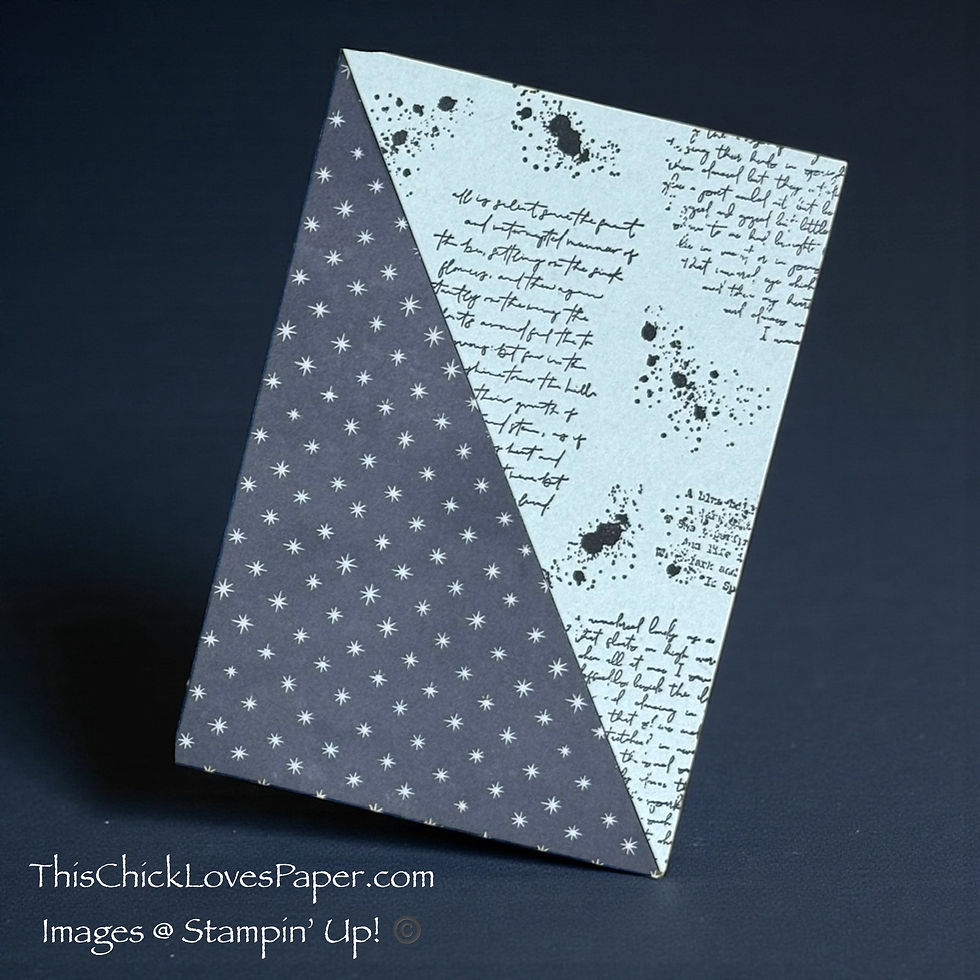
Cut two panels of Peaceful Garden Designer Series Paper to 4½” × 6½” and slice each one diagonally from corner to corner. You’ll get two mirrored triangles—enough for two cards!
Then, cut matching Cloud Cover cardstock panels to the same size and stamp them with the Elements of Text Cling Stamp Set using Secret Sea ink.
Once everything’s dry, tap the edges of both the DSP and Cloud Cover panels with the ink pad to define them, and adhere one of each triangle onto your white-matted card base.
Pro Tip: Keep both triangles together in your MISTI when stamping—that way your text pattern aligns perfectly across both pieces.
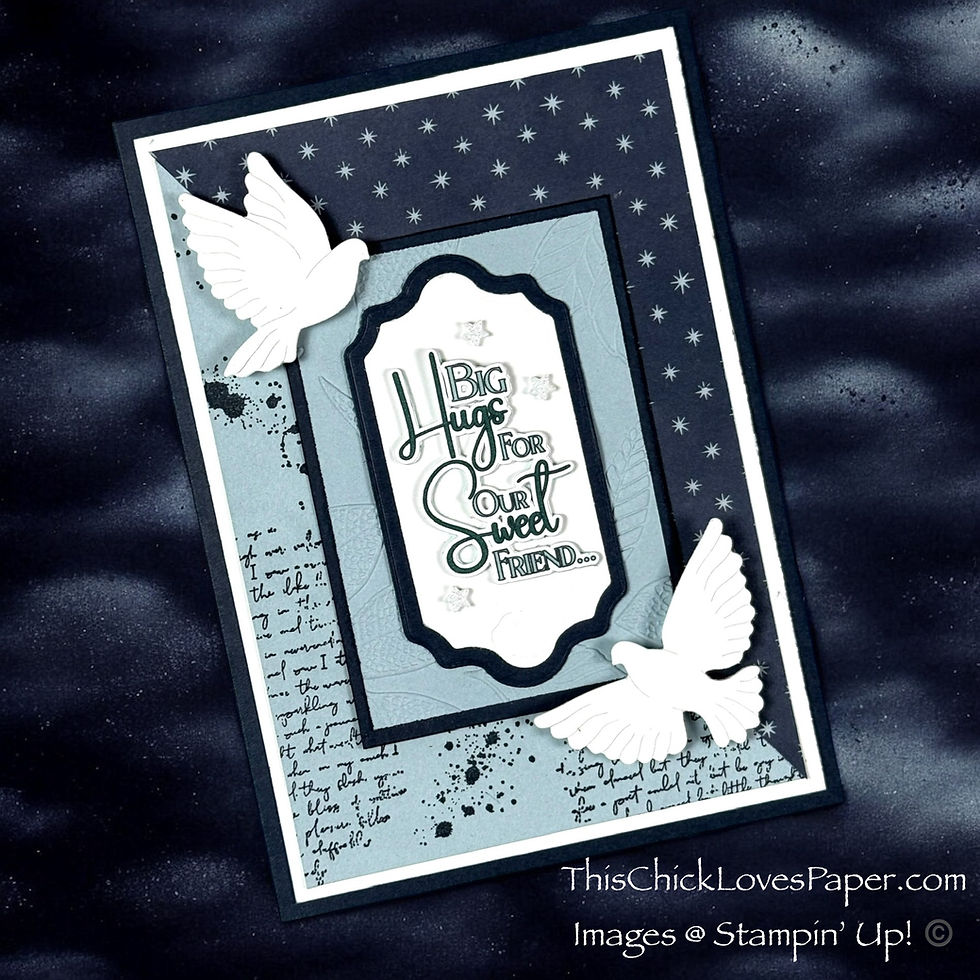
💙 STEP 3: ADD THE EMBOSSED CENTER PANEL

Trim a Secret Sea mat to 3” × 4¼” and a Cloud Cover panel to 2-3/4” × 4”. Ink their edges using that same gentle tapping technique, then emboss the Cloud Cover panel with the Changing Leaves Hybrid Embossing Folder. Layer it on top of the Secret Sea mat and adhere both to the card front, centering along the diagonal seam.
Design Spotlight: The leaf pattern from this folder adds texture without screaming “fall.” Its soft, spaced design feels natural, airy, and perfectly balanced for a sympathy theme. 🍃
💙 STEP 4: DIE-CUT THE TAGS & DOVES

Using the Stampin’ Up! Peace on Earth Dies, cut two sentiment tags—one from Secret Sea and one slightly smaller from Basic White.
For your sentiment, you can either stamp an image from one of your favorite Stampin’ Up! stamp sets or create a custom design in Cricut Design Space—which is exactly what I did! My Lil Man was very specific about what he wanted the card to say, so I designed the sentiment especially for him. 🥹
Once your sentiment is ready, cut several layers of the same phrase and glue them together for a dimensional look. (No foam tape needed—just depth, clean lines, and pure elegance.)

Attach the layered sentiment to the white tag, then adhere your finished tag to the center of the embossed panel.
Next, die-cut two doves from Basic White Cardstock and gently curl their wings for natural movement. Mount them using foam adhesive for lift—these are the only elements you’ll pop up on the card front.
Pro Tip: Stacking die-cuts instead of using foam tape gives the piece a polished, chipboard-style feel—no messy edges, just buttery-smooth dimension. 💫
💙 STEP 5: ADD THE FINAL TOUCHES

Add three white Shimmer Star Foam Stickers inside the tag, nestling them gently around the sentiment. These tiny accents add a soft glimmer that feels peaceful rather than showy—just the right amount of light for a sympathy card.
Keep your placement asymmetrical for a natural sparkle that draws the eye toward the message without overpowering it.
Design Spotlight: Those delicate stars bring quiet light to your design—a gentle reminder that even in soft, subtle moments, creativity still shines. ✨
💙 STEP 6: FINISH THE INSIDE

Cut two Basic White panels to 4¾” × 6¾” and adhere them to the inside of your card.
You can keep it simple or make it shine — add one or two panels, ink the edges, or even stamp them using the same Elements of Text Cling Stamp Set from your card front for a cohesive look.
If you’d like, use your favorite Stampin’ Up! sympathy sentiment for one of the panels, or create a custom design in Cricut Design Space as I did.
Lil Man wanted his clean so everyone at work could write a personal note. This dual-panel setup gives plenty of room for heartfelt messages from friends and coworkers while keeping the inside light, open, and full of space for comfort-filled words.
Pro Tip: Your inside design can be as simple or detailed as you like—just remember, sometimes the blank space carries the most meaning. 💙
💫 CARD COMPLETE – CREATIVITY WITH HEART
And just like that — this bright & cheery crafter pulled off a calm, comforting card that still feels full of personality. 💙 Each layer, texture, and tone came together to create something soft but strong, heartfelt but hopeful. It reminded me that even when life calls for quiet, creativity still has something to say — one cardstock layer at a time.
When Lil Man asked me to make this card, I wanted it to be more than paper and glue. I wanted it to mean something. Seeing his reaction (and his excitement to share it with his coworkers) was one of those proud, full-circle moments every crafter dreams of. So while this card may not have glitter explosions or punny sentiments, it has something even better — purpose.
Now let’s keep that creative flow going, because there’s always more magic waiting to be made. 🌟
🔮 EXPLORE MORE: WHEN BRIGHT & CHEERY FINDS ITS CALM
✨
EXPLORE MORE: WHEN BRIGHT & CHEERY FINDS ITS CALM (Revamped)
If you’ve been hanging out with me for any length of time, you know my crafting style is usually more “confetti cannon” than “quiet reflection.” But every now and then, creativity asks us to soften the edges and swap sparkle for serenity.
This card reminded me that handmade art shows up for all seasons of life — the joyful ones, the messy ones, and the tender ones where words don’t always come easy. And just like that… calm became its own kind of beautiful.
If this peaceful, layered style speaks to you, stick around. Because once this project wraps up, you know I’ll be heading right back into bold, bright, glitter-fueled chaos — scrapbook layouts that POP, cards that SHINE, and moments that sparkle louder than a disco ball. ✨
Wherever your creativity lands next, I’ve got inspiration ready to meet you there.


SHARE YOUR HANDMADE SYMPATHY CARD CREATIONS IN THE MEMBERS GALLERY

Sometimes the quietest cards tell the strongest stories. If you’ve created your own sympathy card — gentle, simple, or beautifully layered — I’d truly love to see it. These are the projects that come from a deep place of care, and seeing how you interpret comfort through paper is pure creative magic.
Share your card in the Members Gallery and tell us a little about the heart behind it. Who were you thinking of? What inspired your colors or textures?
Your design might be the gentle encouragement another crafter needs — a reminder that handmade kindness travels farther than we ever realize. 🤍✨
💥 FINAL THOUGHTS: WHERE HEART MEETS HANDMADE

And that’s a wrap on this layered labor of love — proof that even a sympathy card can shimmer with meaning when it’s made from the heart. 💙 Crafting this one reminded me that handmade isn’t just about paper and glue; it’s about people. It’s about pausing for a moment of care, slowing down enough to fold kindness into every layer, and remembering that art always finds a way to heal.
Watching Lil Man’s face light up when he saw the finished card? That was my home run. ⚾ Because in that moment, I realized the sparkle doesn’t have to come from glitter — it can come from love, empathy, and intention.
So the next time you sit down to create, don’t worry about whether your project is too bright, too bold, or too quiet — just make it yours. Because no matter what you’re crafting, the heart behind it will always shine through. 💫
Sending love, light, and endless creativity your way.
April – This Chick Loves Paper
🛒 Grab Your Supplies & Get Crafting!

All photos and projects are subject to copyright © ThisChickLovesPaper.com.
Images © Stampin’ Up!®
The content in this blog is the sole responsibility of April Raine – This Chick Loves Paper as a Stampin’ Up!® Independent Demonstrator. The use of and content of classes, services, or products offered is not endorsed by Stampin’ Up!®
Learn how to make a handmade sympathy card with this 5” × 7” step-by-step tutorial from This Chick Loves Paper.
This calm, layered card design uses Stampin’ Up! dies, embossed textures, and soft color blends to create a heartfelt and comforting sympathy card. Follow the full guide to craft a thoughtful, handmade card filled with meaning and love. 🤍✨
⭐How I Protect My DSP, Cardstock & Finished Cards

I store my DSP, cardstock, scraps, and even finished cards in these clear resealable bags.
The 2-mil thickness is perfect for everyday crafting (they make a 4-mil option if you want extra durability!), and they’re tough, reusable, and great for keeping your entire crafting stash clean, tidy, and protected from the chaos of the craft room.
*As an Amazon Associate, I earn from qualifying purchases.
• 13×13 Plymor 2mil Zipper Reclosable Bags — for 12×12 DSP, cardstock sheets & scraps
• 9×12 Plymor 2mil Zipper Reclosable Bags — for 8.5×11 cardstock & scraps
• 6x8 Plymor 4mil Heavy Duty Reclosable Bags — for storing extra die cut embellishments & finished cards, card workshop kits


Comments