💙 Bluey-Inspired Pull-Top Stocking: From “Meh” to MAGNIFICENT! | Handmade Gift Card Holder!
- This Chick Loves Paper

- Dec 16, 2024
- 6 min read
Updated: Mar 11, 2025

Some projects come together perfectly the first time.
This was NOT one of those projects. 😂
This Bluey-inspired pull-top stocking started as a sweet request from my bestie for her grandkiddos. How could I say no? But let me tell you—what started as a wholesome holiday craft quickly spiraled into a comedy of errors, last-minute panics, and one serious case of middle-child syndrome.
At one point, I genuinely considered gluing on a giant bow and pretending my work here was done.
Ever crafted something and thought, “Hmmm… it’s cute, but something’s… off?”
Yeah. Same.
So buckle up, my crafty comrades—because this blog is about to take you on a wild ride filled with name mix-ups, design flops, and one VERY determined stocking that refused to be basic. 😆
🎁 Where This Bluey-Inspired Pull-Top Gift Holder Stocking Took a Wrong Turn
It all started when my bestie asked me to make three stockings:
✔ A sewing and patchwork-themed one (adorable, classic, no problems)
✔ A Sonic-inspired one (fun, easy, nailed it)
✔ And a Bluey-inspired one (aka the stocking that laughed in my face)
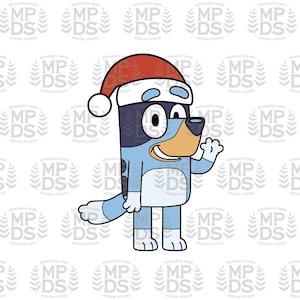
Here’s the thing—I had never watched Bluey. So, like any responsible crafter, I sprinted to Etsy, snagged a couple of SVG files, and prayed for the best.


With my files in hand, I pulled out the perfect cardstock colors:
✔ Azure Afternoon & Night of Navy – for the stocking base
✔ Real Red – for accents
✔ CTMH Jade – for holly leaves (or Stampin’ Up! Garden Green if you’re feeling fancy!)
At this point, I was feeling confident. I had my pieces. I had my vision. What could go wrong?
😂😂😂
🧵 Stocking Construction: The Part That Should Have Been Easy

Since all my pull-top stockings follow the same construction method, I’m skipping the assembly tutorial here. But if you need it, check out my Pull-Top Stocking Gift Card Holder Tutorial for all the step-by-step goodness!
👉 This blog is more of a “stocking GLOW-UP” than a full tutorial. But don’t worry—most of my projects walk you through every detail, so if you’re looking for stocking assembly instructions, I got you!
Once the basic structure was done, it was time for the details—and this is where things took a turn for the ridiculous.
🚨 The Name Debacle: My First Major OOPS!


I had proudly finished all three stockings, snapped some photos, and sent them to my bestie.
She loved them! 🎉
And then… the next day… I got a message.
👉 “This stocking is for my granddaughter Everly… not Oliver.”
I 👏 PUT 👏 THE 👏 WRONG 👏 NAME 👏 ON 👏 THE 👏 STOCKING. 👏
Everly, sweetie, I am so sorry.
Thankfully, this was a quick fix, but at this point, the stocking was already on thin ice.
And then, just when I thought I was finally in the clear…
Marsha, Marsha, Marsha! – The Middle Child Stocking Struggle

Once I lined up all three stockings for a cute little Pinterest-worthy photoshoot, it hit me.
👀 The Bluey stocking looked… kinda sad.
The Sonic stocking was bold and fun.
The sewing-themed stocking was whimsical and charming.
And then there was Bluey, standing there like it had shown up to the wrong party.
I called my bestie and said, “Okay, listen. This stocking needs HELP.”

Being the saint she is, she said: “It’s fine! You don’t have to change it!”
But THEN I found out something important…
This stocking was for the middle child.
Cue Jan Brady screaming: “Marsha, Marsha, Marsha!”
I refused to let this stocking get overshadowed. Middle children deserve EXTRA MAGIC. So, back to the craft table, I went!
✨ Crafting CPR: Bringing This Stocking Back to Life

✔ Double-Matted Centerpiece – I layered Deckled Circle Dies with a Real Red inner mat and a White Willow outer mat. That extra red? CHEF’S KISS. 👌
✔ Wrapped Gifts & Candy Canes – Stolen (ahem, I mean borrowed) from my CTMH Home for Christmas Digital Art Kit. Because if you can reuse designs, DO IT.
✔ SVG Swap – The original Bluey file wasn’t printing correctly (because of course, it wasn’t), so I switched to a different one and placed them in front of a Christmas tree.
✔ Peppermint Perfection 🍬 – Adhesive-backed Peppermints became ornaments on the tree—small detail, HUGE difference!
✔ Holly Leaves – Tucked Jade-colored holly under the Deckled Circle Die and on the cuff for extra oomph.
✔ White Gel Pen Stitching – Added faux stitching to the toe & heel for that handmade charm.

✔ Snowflakes & Sparkle – Pool Party cardstock snowflakes + Rhinestone Basic Jewels = HOLIDAY MAGIC.
✔ Shimmer, Shimmer, Everywhere! I used my CTMH Clear Shimmer Brush to add sparkle to snowflakes, Santa hats, and even Bluey’s tiny festive gear.
✔ White Gel Pen Stitching – Added faux stitching to the toe & heel for that handmade charm.
And just like that… the middle-child stocking got its Cinderella moment!
No more “Marsha, Marsha, Marsha!” moments here!

No more “Marsha, Marsha, Marsha!” moments here—this beauty is standing proudly alongside its stocking siblings, just as festive, just as fabulous, and absolutely ready to shine!
✨ Now, looking at them all together, you’d never guess one of them had a glow-up moment. Each stocking brings its own unique magic, proving that a little creativity (and a second chance) can turn any project into a showstopper!
💥 Explore More: A Festive Wonderland of Inspiration!
Think this stocking glow-up was impressive? Wait ‘til you see THESE holiday creations!
👇 Click through the gallery below to explore even more stocking magic!


🎉 Your Turn! Show Off Your Stocking Magic!
Ever made a project that didn’t sit right the first time? Did you redo it, or embrace the “oops”?
💬 Drop a comment below & tell me your funniest crafting fail!
📸 Post your Bluey-inspired (or ANY inspired) stocking in the Members Gallery! I cannot wait to see how you put your own creative spin on this design!
💙 Tag me on Instagram & Facebook (@ThisChickLovesPaper) so I can hype up your holiday masterpiece!
Because let’s be real—middle-child stockings deserve a little extra love. 😉
✨ Final Thoughts: Because Every Project Deserves Its Moment to Shine!


Take a look at this transformation! The original Bluey stocking (top photo) was cute, but the updated version (bottom photo)… it’s got holiday magic written all over it!
Sometimes, all a project needs is a fresh perspective, a few extra details, and a sprinkle of shimmer. ✨
Crafting isn’t just about making things—it’s about making MEMORIES. Whether it’s fixing a name mix-up (whoops!), adding last-minute embellishments, or turning a “meh” project into something jaw-dropping, the journey is always worth it!
🎄 Merry Christmas & Happy Crafting!
🔥 April – This Chick Loves Paper
🛒 Grab Your Supplies & Start Crafting!
Photo Disclaimer:
All photos and projects are subject to copyright ThisChickLovesPaper.com.
Images @ Stampin’ Up!©
Blog Disclaimer:
The content in this blog is the sole responsibility of April Raine - This Chick Loves Paper as a Stampin’ Up!® Independent Demonstrator. The use of and content of classes, services, or products offered is not endorsed by Stampin’ Up!®.
💙 Learn how this Bluey-inspired pull-top stocking went from “meh” to MAGNIFICENT! This handmade gift card holder is interactive, festive, and fully customizable—perfect for Christmas crafting! 🎄✨ Get the full step-by-step details and see the stocking glow-up at This Chick Loves Paper!


Comments